Copy HubSpot’s Strategy To Generate More Than 60,000 Leads Per Month
Did you know that HubSpot generate more than 60,000 leads per month? source
That’s such a huge number that it probably feels out of reach for the average business – after all, HubSpot have hundreds of employees and million dollar budgets. How can you possibly compete with that?!
Well, there is one part of their strategy that is relatively easy to replicate. In fact, it’s so simple that you could set this up in a single afternoon without spending a penny. In this article I’ll show you how.
HubSpot Resource Library
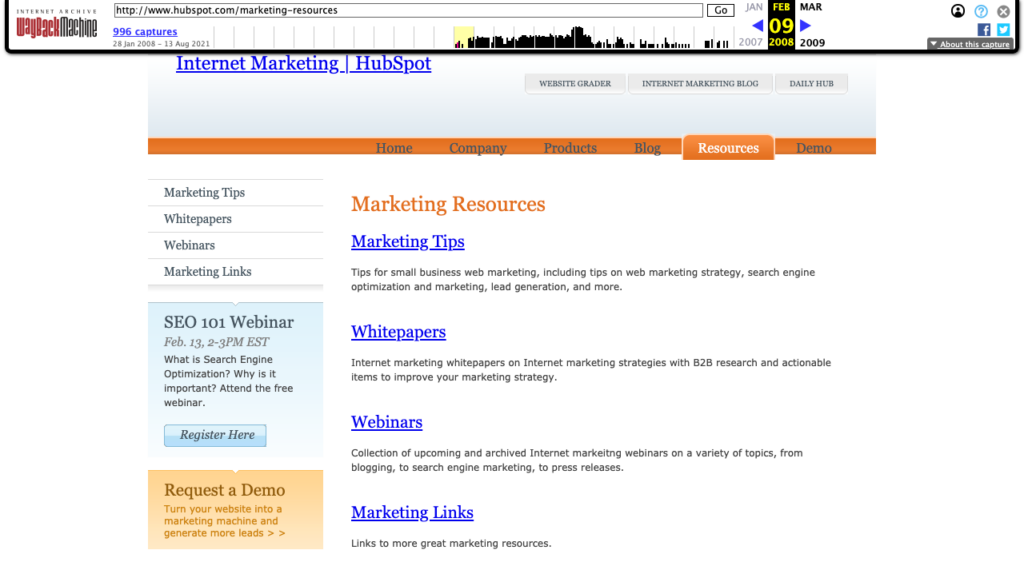
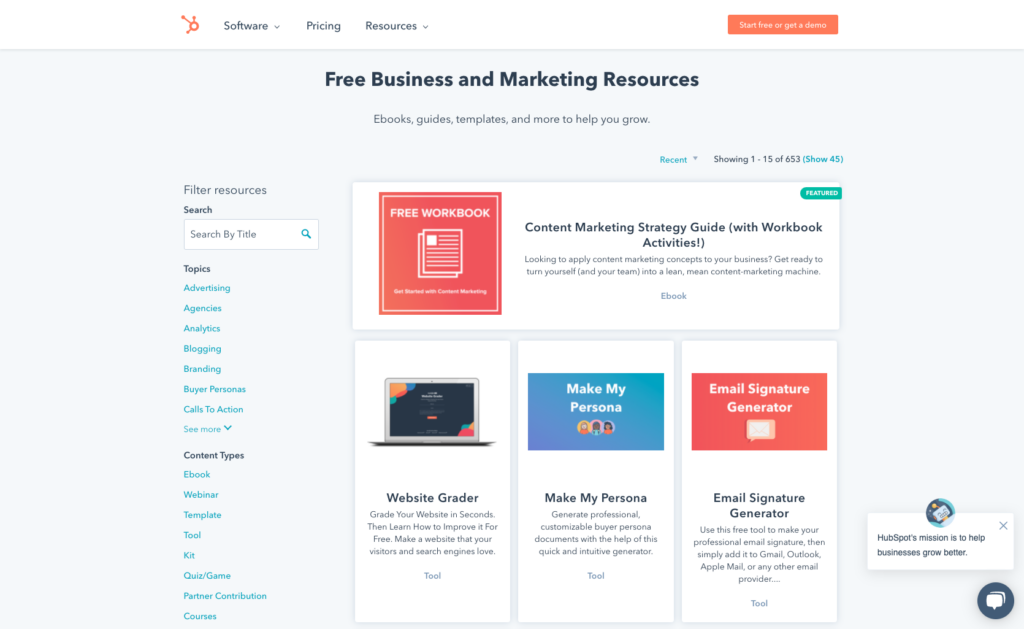
The HubSpot Resource Library is a collection of eBooks, templates and tools that have been made to help educate their potential customers.
The lead generation strategy here is simple: people browse the library, find a resource they like, then enter their details to download it.
The library was first launched back in 2008 with just a handful of resources but is now home to more than 600 resources!
Why Is The Resource Library Successful?
The resource library is a key part of any B2B lead gen strategy but the HubSpot library is particularly successful for three reasons.
1. User Focus
By placing all their resources in one place, website visitors don’t have to work hard to find a relevant resource. They are also more likely to stumble upon a valuable resource that they didn’t know existed. This self service model of content means that people will select the resources that are most relevant to them.
2. Evergreen Asset
When the library was first launched in 2008 it had only a handful of resources. There are now 653 resources in the library! As the quantity of resources increases, the library becomes more useful to customers and so generates more leads. Granted you may need to remove or update some resources over time to ensure the information stays up-to-date but that’s a small overhead when considering the potential returns.
3. One-Stop Destination
The library is bursting with so much quality content that people actively share the library as one-stop-shop for quality resources.
Components Of A Successful Resource Library
Lets take a look at the library itself:
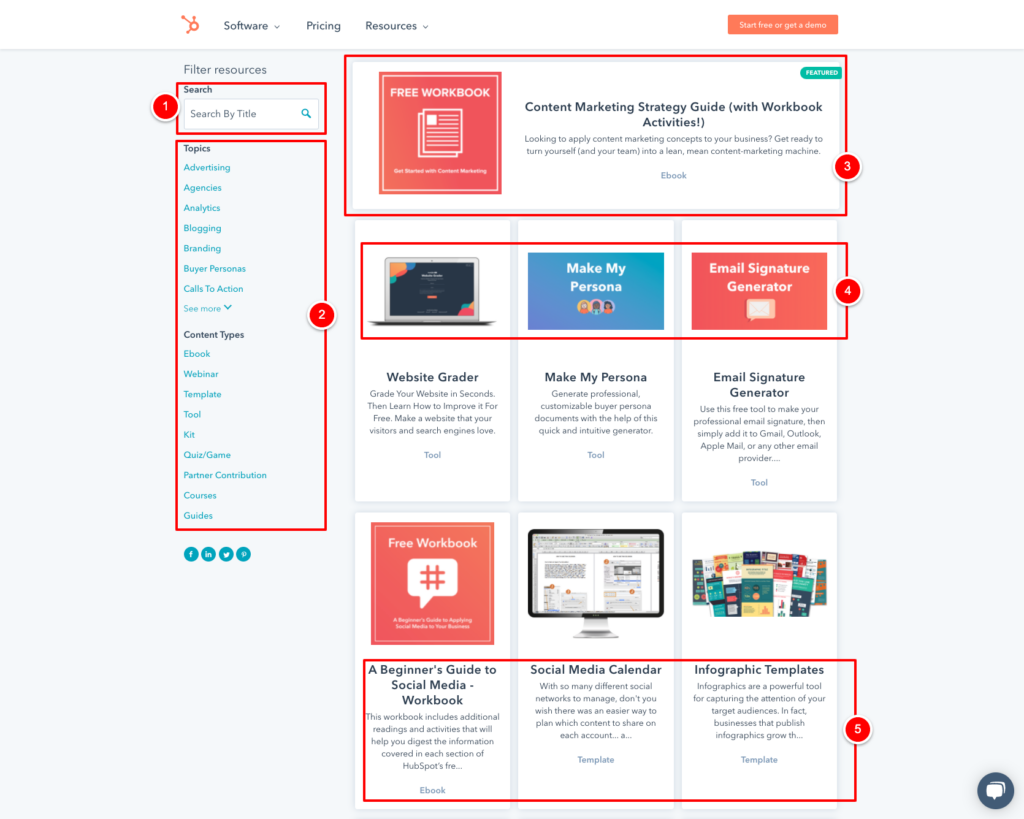
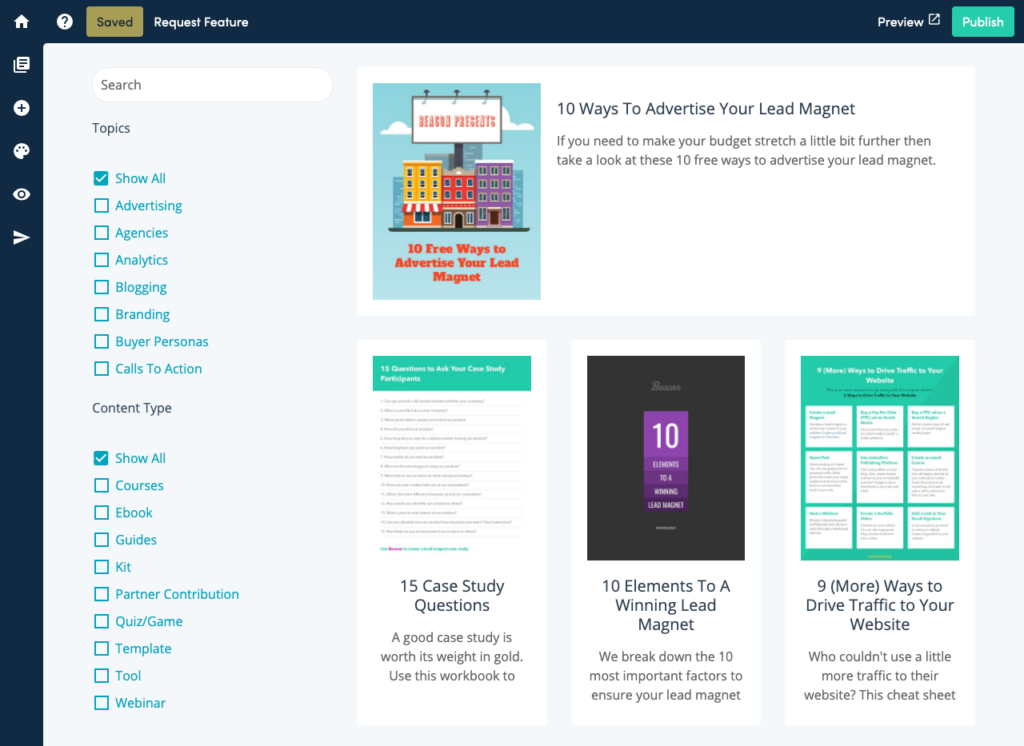
While the Resource Library looks relatively simple there are a number of features that HubSpot have included to ensure that the library is as user friendly as possible:
1. Search
If a website visitor knows exactly what resource they are looking for then their first instinct will be to look for a search box. It’s important that this box should only search through the resource library – you don’t want to confuse people by showing search listings for your entire website.
2. Multi Level Categories
Unlike the search box, the links under the ‘Topics’ and ‘Content Types’ headings are for people who don’t know exactly what they are looking for. These keywords will help people to browse and discover resources. The more categories you can offer, the more helpful they will be.
3. Featured Resource
The ‘featured resource’ takes up more space on the screen than the other resources. This helps you to promote a specific resource that you think is most important and it also helps you to draw the attention of any returning visitors who might be checking for new resources.
4. Highly Visual
Every resource in the library has an accompanying image. People use images to get a quick sense of what each resource is about so it’s important that you use high quality images to catch people’s attention.
5. Informative
If the purpose of the thumbnail image is to catch a person’s attention then the written description will help them to quickly assess if a resource is relevant to them. It’s important that this short description is visible without the reader having to click to view it.
How To Make Your Own Resource Library
I promised you at the start of this article that you could replicate HubSpot’s resource library strategy in a single afternoon. Considering all the fancy functionality that I listed above you may be starting to wonder how you’re going to build this for your own website in just a few hours.
Beacon’s Resource Library product will help you to do just that without writing a line of code or hiring a designer / developer. We will include search, categories, featured resource, automatic thumbnails and more. You ready? Let’s get started:
Step 1: Gather Your Resources
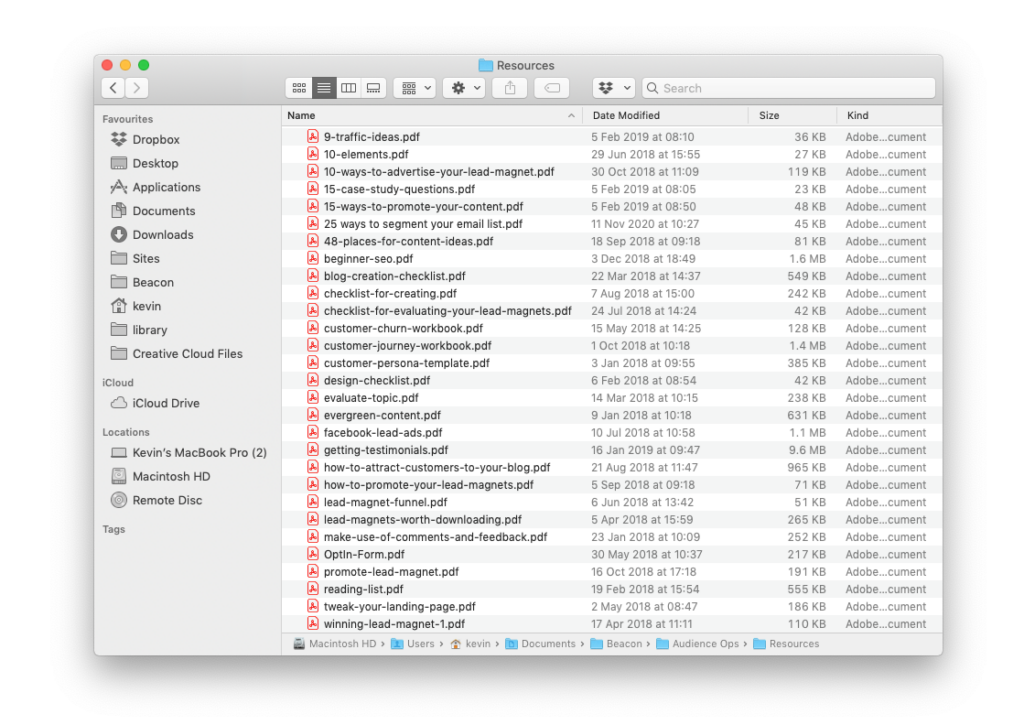
You can’t have a resource library without some resources. Don’t worry if you only have a handful of resources, just use what you have and add more as you make them – just like HubSpot did. Remember, these resources can be anything that you think a potential customer would find interesting or useful. That could be eBooks, presentations, webinars or videos.
Step 2: Create A New Library
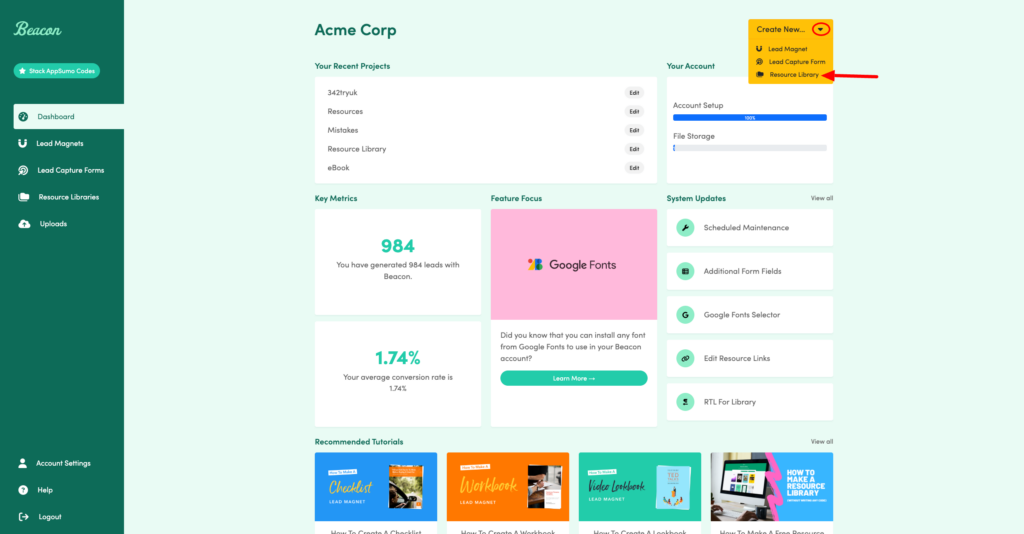
Log in to your Beacon account and select ‘Resource Library’ from the ‘Create New’ menu on your dashboard:
Step 3: Upload Your Resources
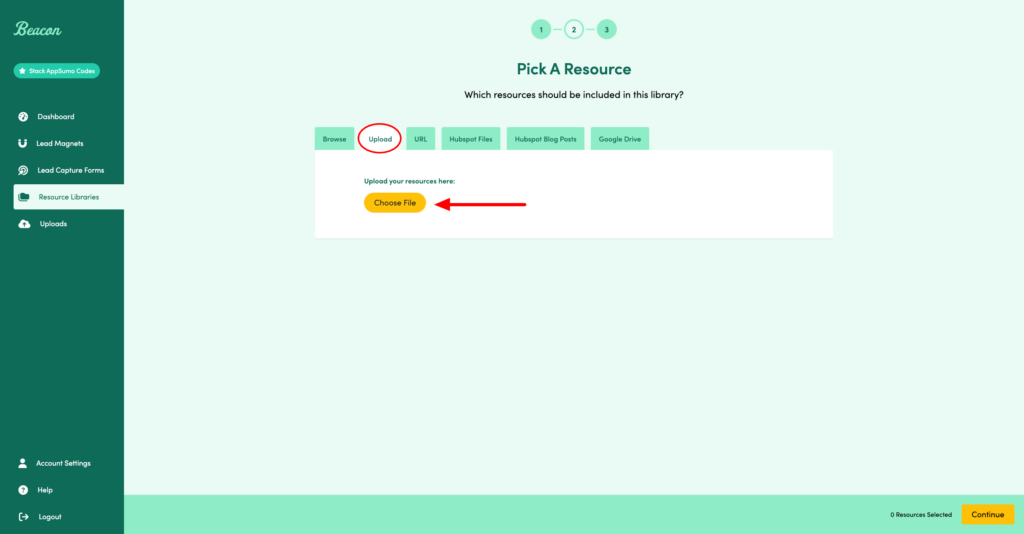
Once you have an idea of what resources you want to include in your library you need to upload them into Beacon. You can upload multiple resources at once and these resources can be any file format including documents, videos or audio.
Step 4: Customize The Library To Suit Your Brand
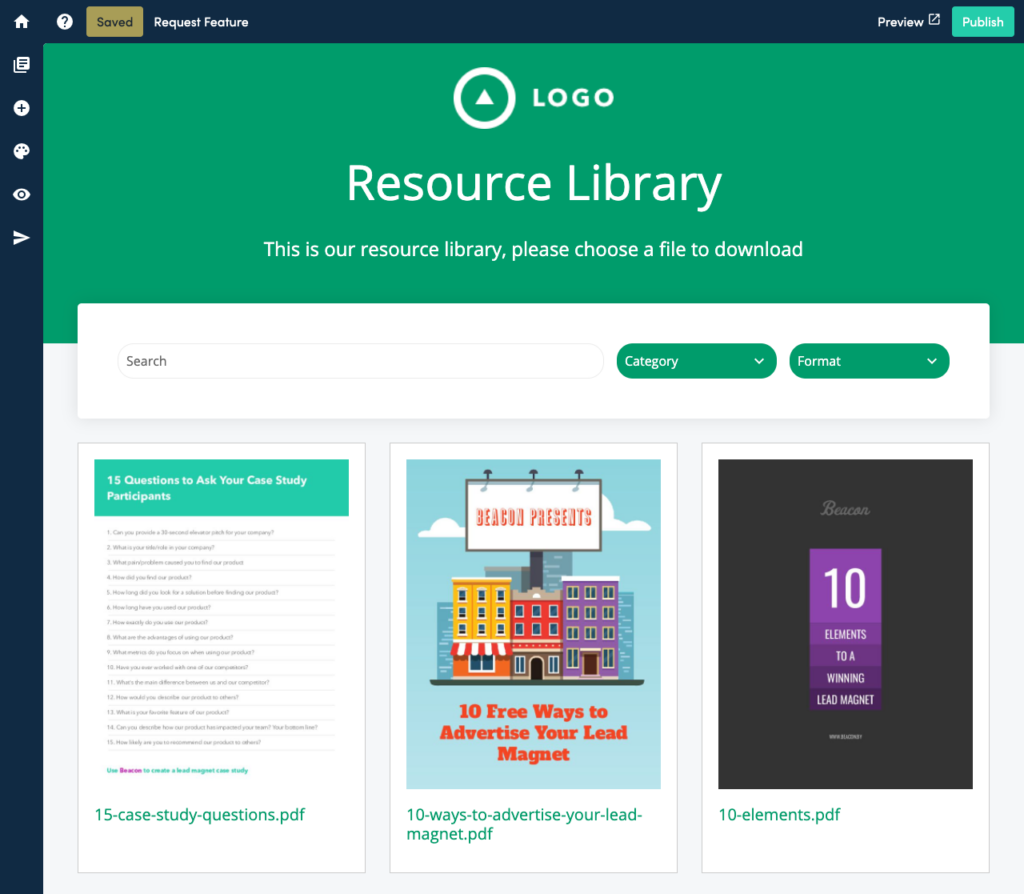
This is the default view of your new library. Notice that thumbnail images have been automatically generated for every resource? That should save you a few hours of tedious cropping.
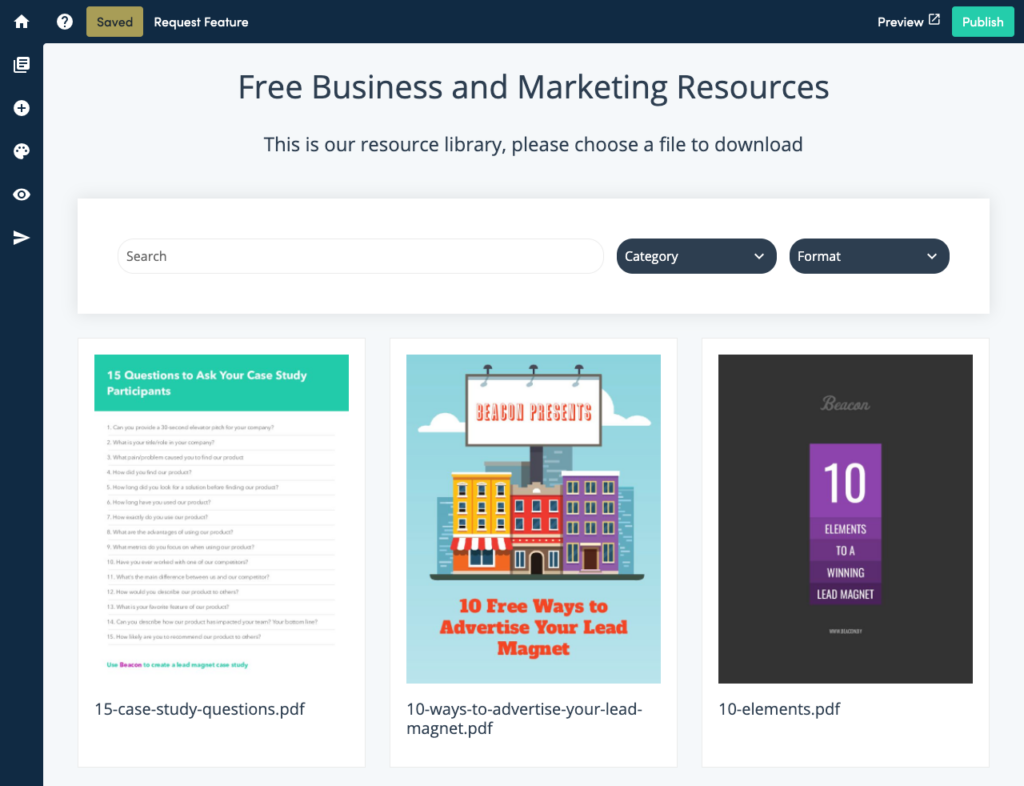
You can change the default colors and fonts used to suit your own brand:
You can even change the layout of the library with a single click. Let’s choose the ‘sidebar’ option since that’s what HubSpot use.
Now that we’re finished the cosmetic updates our library looks like this:
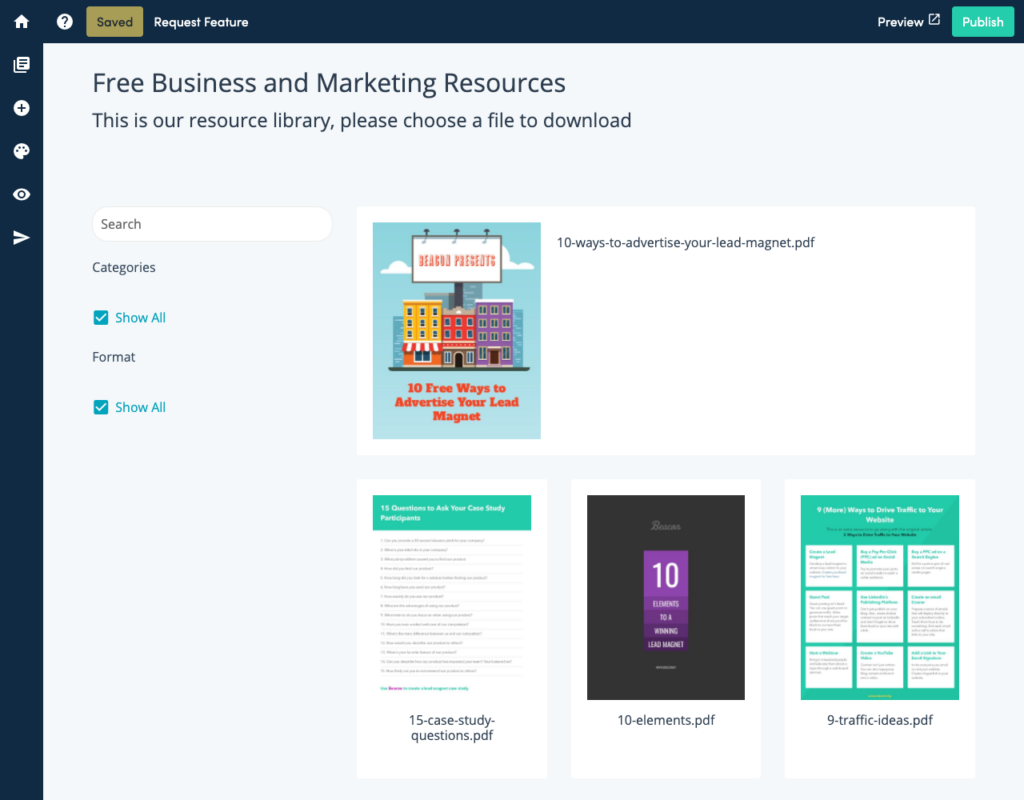
Step 5: Give Each Resource A Title and Description
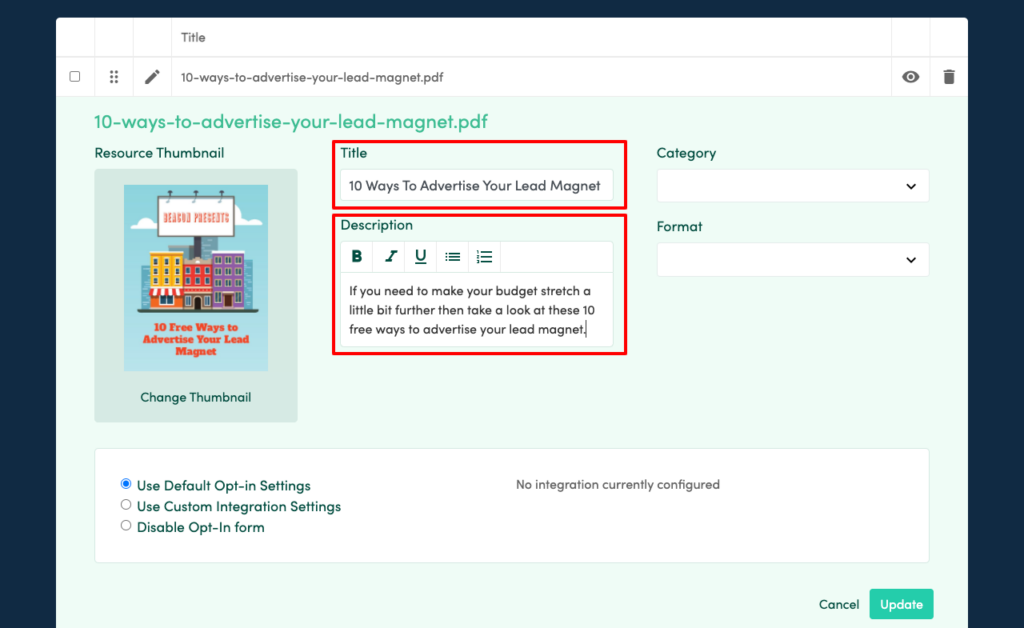
Using the ‘Manage Resources’ option you can quickly give each resource a text description:
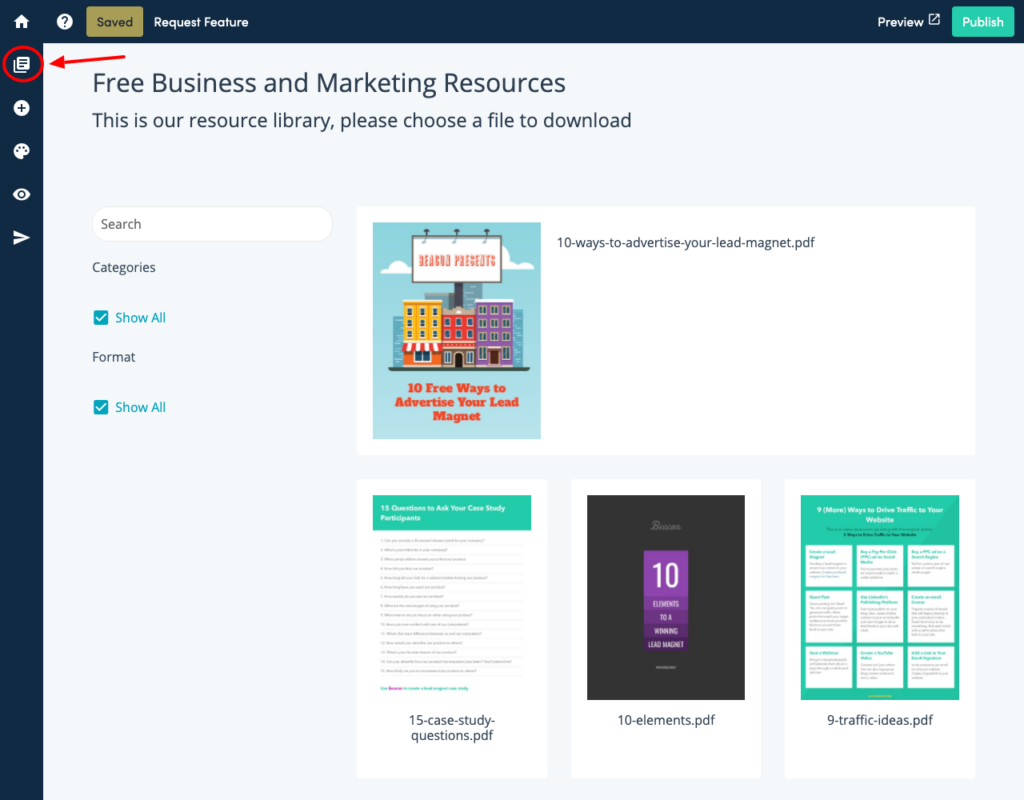
This is your chance to convince people to download the resource so be sure to focus on the benefits and demonstrate how it can help the reader.
Step 6: Categorize Your Resources
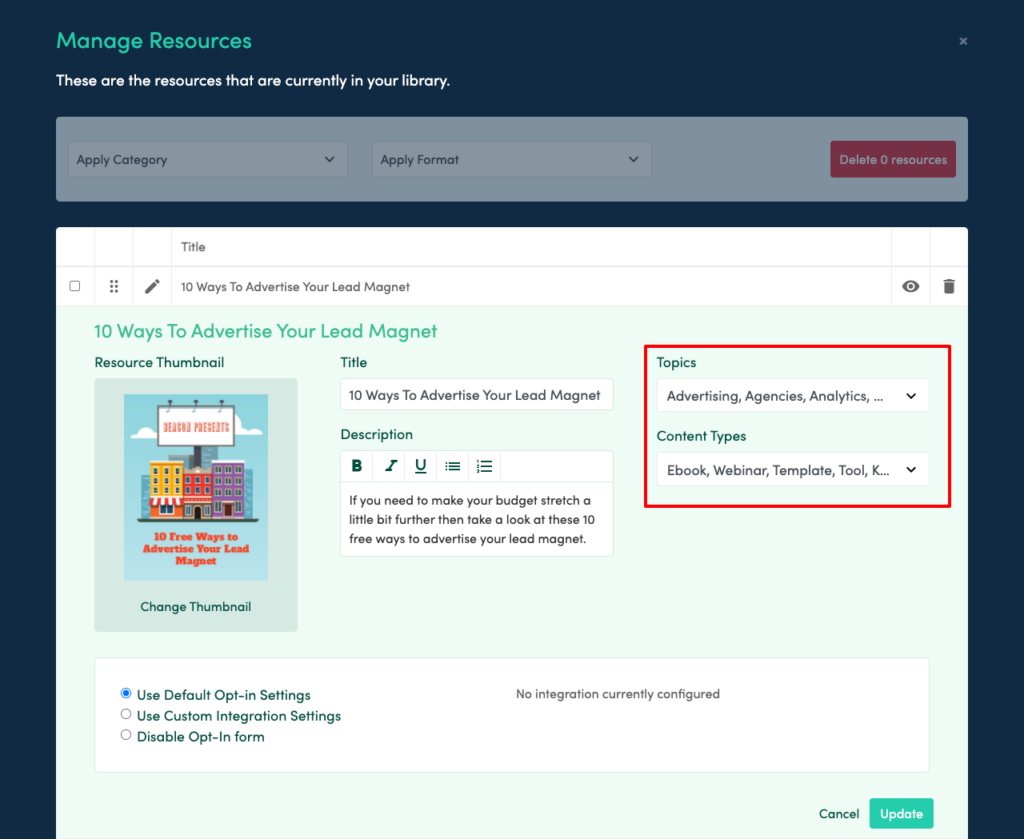
Filters like ‘Category’ and ‘Format’ help your audience to browse the library and these become even more important as your library grows. Beacon allows you to categorize your resources on two different levels. The default filter options are ‘Category’ and ‘Format’ but you can change these to be whatever you like by clicking on the filter menu.
Let’s change Beacon’s default settings to be the same as HubSpot’s:
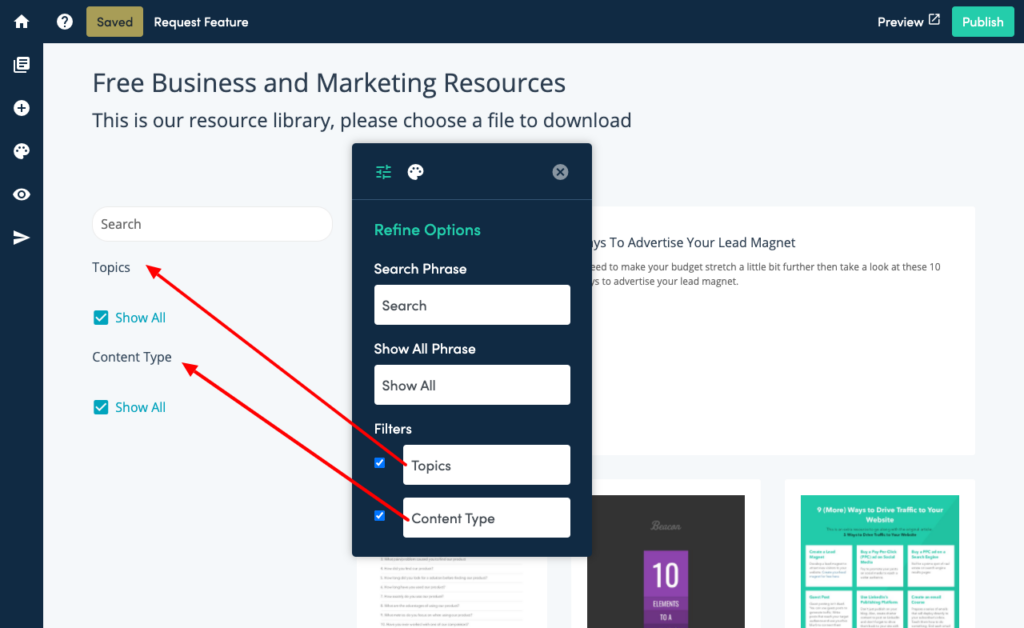
Back in the ‘Manage Resources’ screen you can assign each resource in your library to a particular ‘Topic’ and ‘Content Type’
Now our Resource Library is really starting to look like HubSpot’s:
Step 7: Configure Your Opt-In Form
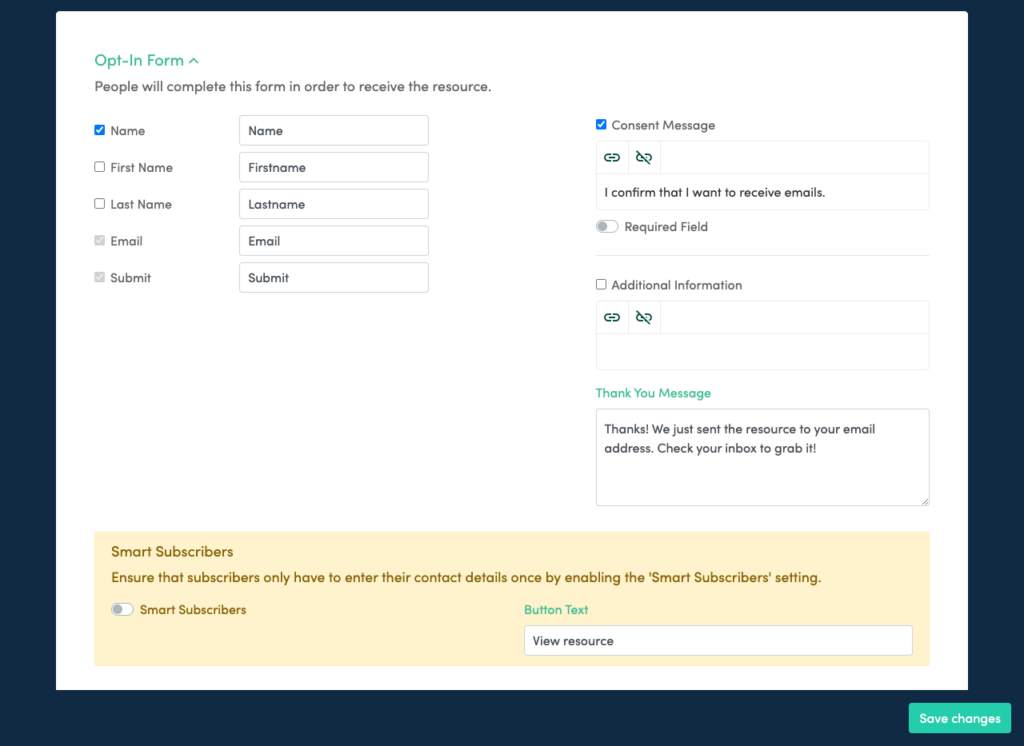
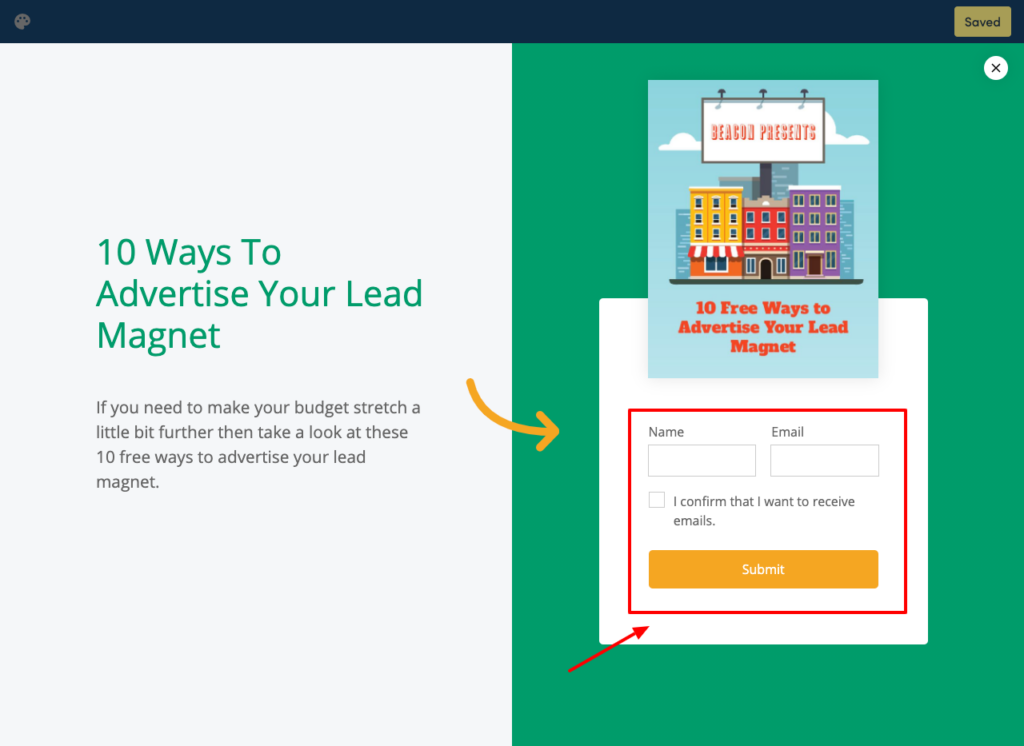
Of course no Resource Library is complete without opt-in forms. These forms are necessary so you can collect contact details from website visitors in return for each resource.
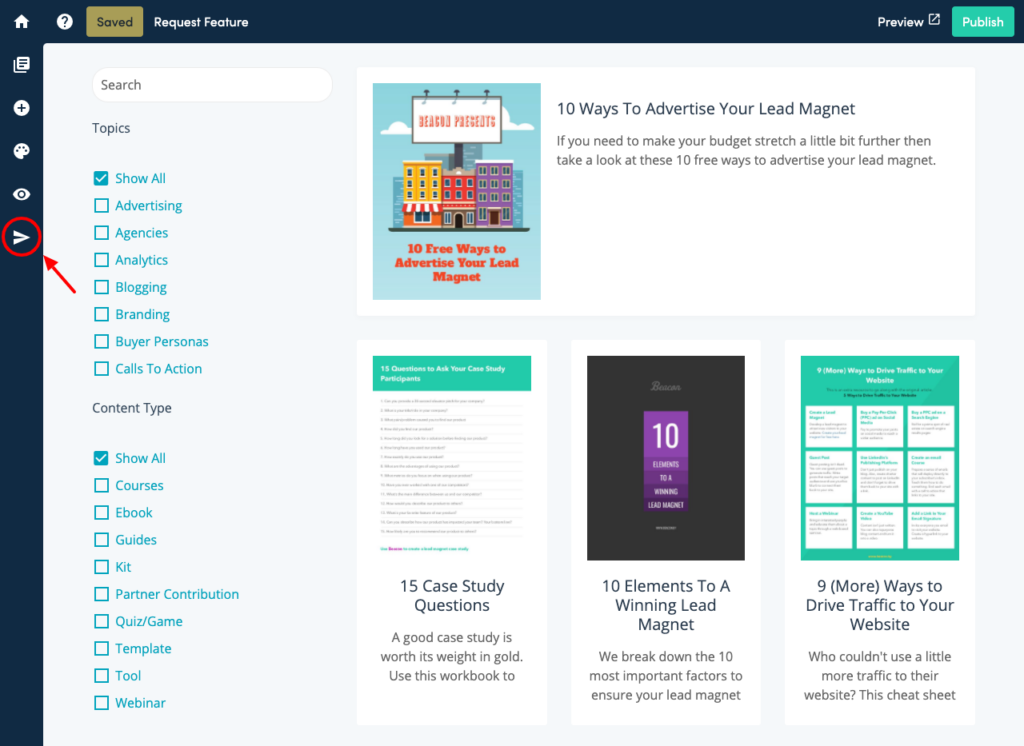
You can configure your form via the ‘Opt-In Settings’ screen:
Choose which fields you want to include in the form:
And this is what your visitors will see:
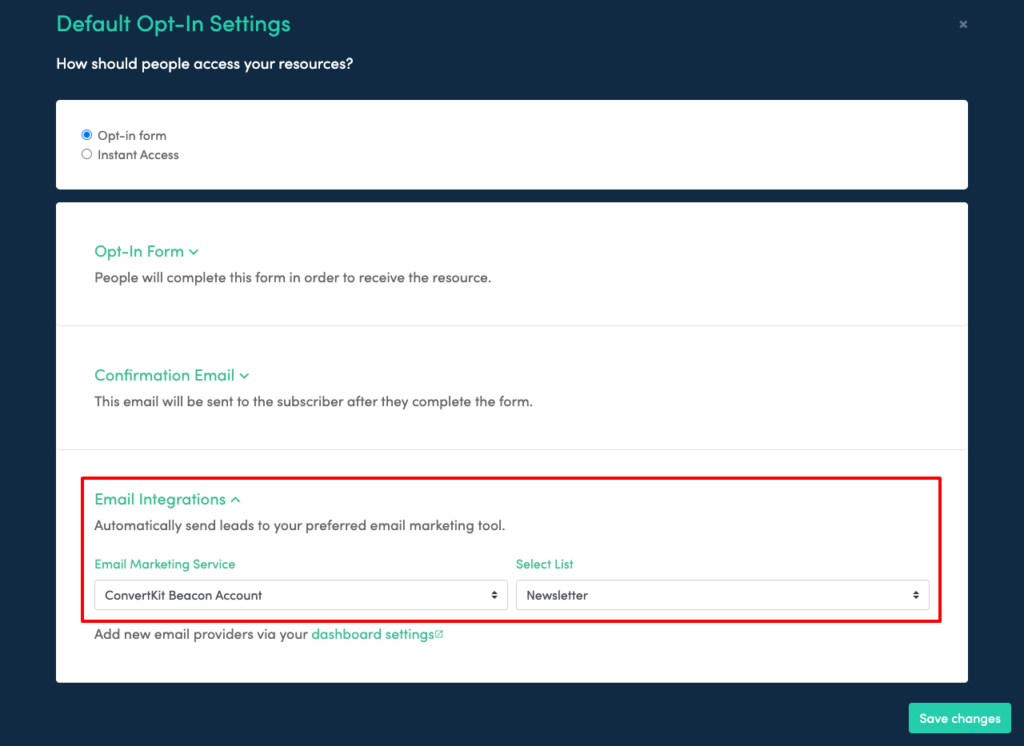
Be sure to connect the Resource Library to your preferred email marketing system so you can add new leads to your nurturing sequence:
Step 8: Publish Your Library
Once you are happy with how your library works it’s time to publish. There are two ways to do this:
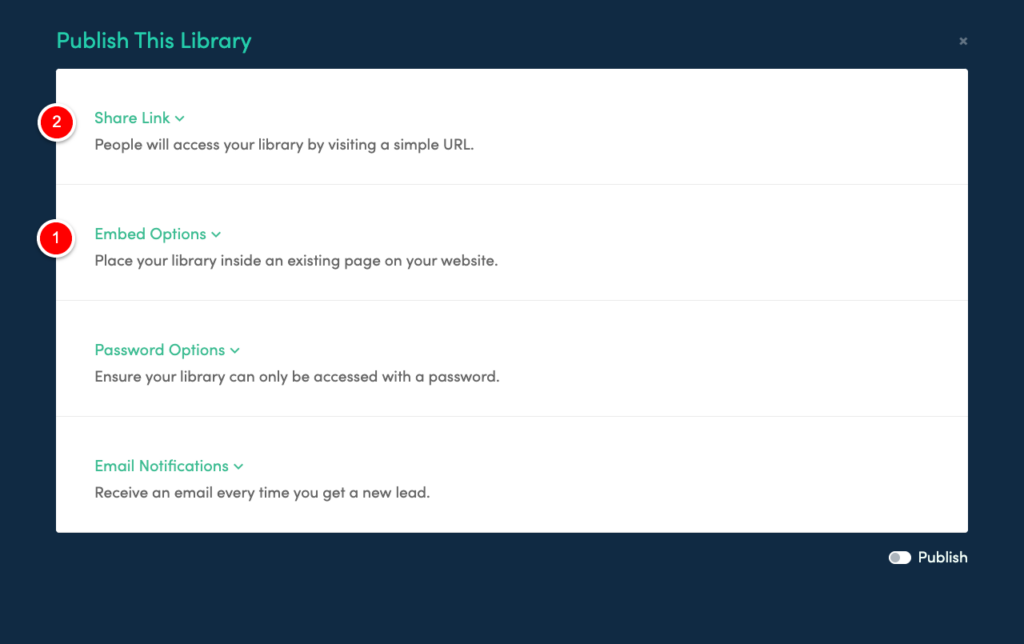
1. Embed the library inside an existing page on your website
This is the recommended method as it allows you to include your existing website navigation above the library, providing a seamless experience for your users.
2. Publish the library to a standalone web link
If you don’t have a website or you don’t want the library to appear within your usual website setup then you can publish to a standalone link so people can access your library directly.
So there you have it, in just a single afternoon you will have been able to build your own resource library with all the fancy functionality that a mega company like HubSpot has. The difference is you haven’t had to spend millions of dollars to do it