When you generate a new lead you can choose to send the subscriber’s information directly to your Zapier account.
Step 1 – Add A New Provider
Visit the email integrations tab of your account settings, click the ‘add a new provider’ button:

Step 2 – Save This Zapier Account
Choose Zapier from the Providers dropdown menu.
Since you can connect several Zapier accounts to Beacon it is a good idea to give each one a unique name so you can refer back to it later.
Once you’ve done this, click ‘add integration’

Step 3a: Lead Capture – Copy Your Authentication Code
If you are creating a Lead Capture Form then you can copy your authentication code (This is the code we are going to use later in the Zap for “Form ID”) from the ‘Actions’ screen:

Step 3b: Resource Library – Copy Your Authentication Code
If you are creating a Resource Library then you can copy your authentication code (This is the code we are going to use later in the Zap for “Form ID”) from the ‘Opt-In Settings’ screen:

Step 4 – Create A New Zap
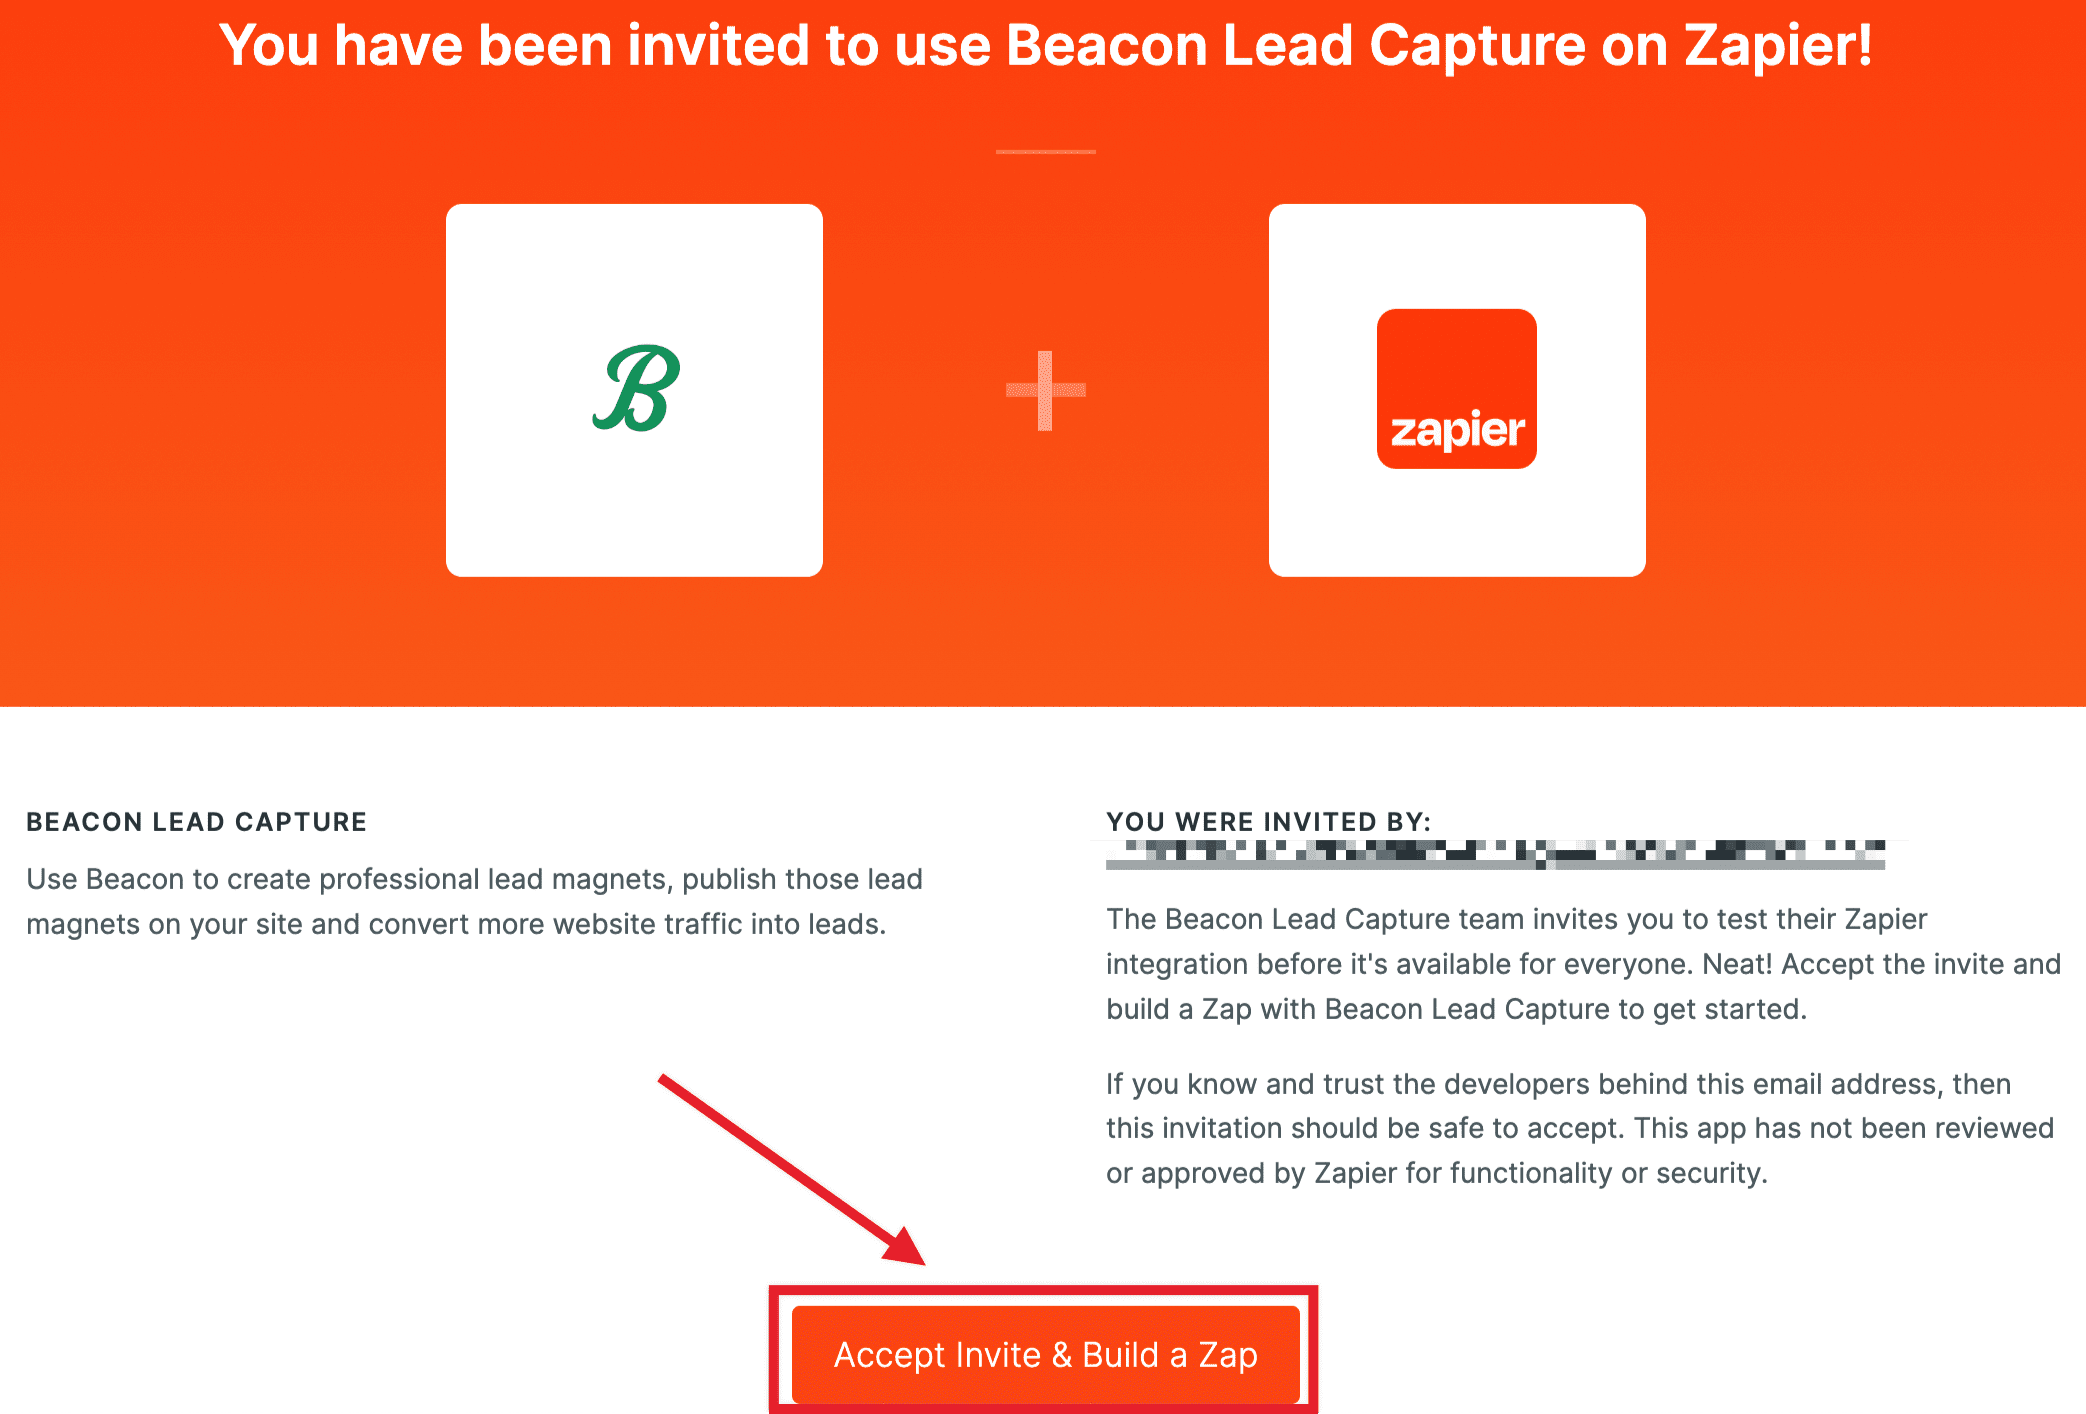
While we are waiting for the Beacon Zapier integration to be made public, please use the following URL to find Beacon:
https://zapier.com/developer/public-invite/76801/e786437d0bc2b40328a4c6cfeaa7ec4f/
Click the Accept Invite & Build a Zap button:
On the next screen, click on + Create >> New Zap

On the next screen, you can rename the Zap. Choose a name that clearly reflects your goal.
Then, click on Trigger, search for Beacon, and select Beacon Lead Capture.
On the Trigger Event, select New Subscriber and sign into by connecting your API Key found in the API settings in your Beacon Account.
![]()
![]()
Click on the “Yes, Continue to Beacon Lead Capture” button.
Please Note: The API key can be found at: https://beacon.by/dashboard/settings#/api-key
Once authenticated, click on Continue and specify the Form ID we captured in steps 3a or 3b above:

After entering the Form ID, click on Continue and click on Test Trigger.

The test will show that a record has been added successfully, then click on “Continue with selected record”.

Next, you’ll be taken to the Action section, where you can create an event and choose where to send your new lead details.