Viewing All Posts By
admin

Delivering Lead Magnets From Your Own Email Address (Lead Capture)

Want to make sure your emails to new subscribers come from your address? When someone opts in to grab a resource from your library, we’ll email it to them. To use your own email address instead of the Beacon address, you’ll need to add an email signature to your Beacon account.

Please note this feature is not available on free accounts.

Step 1: Visit Your Account Settings

Visit your account settings and click the ‘Sender Signatures’ button:

Step 2: Enter Your Details

Enter the name and email address that will be shown to people who receive your resources, then click the ‘add’ button:

Please Note:
  1. You’ll need to be able to access the inbox of any email address you enter here.
  2. Gmail, Hotmail, and other free email addresses won’t work.

Step 3: Confirm Sender Signature

Check your email account for an email from ‘Postmark Support’ and click the ‘Confirm Sender Signature’ button:

You should then be redirected to this “Sender Signature activated” page:

Now when you visit your Beacon Sender Signatures page you will see that the email address has been confirmed:

Step 4: Change Lead Capture Settings

To begin using your new email signature you should enable it in your Lead Capture form. You can do that via the ‘Confirmation’ tab:

Select your email address from the drop-down menu and click ‘Save’.

Please note, that if you’ve got more than one Lead Capture Form, make sure you’ve selected the correct signature on all of them!
To see your collected leads, head over to the Lead Capture dashboard. You can view submitted leads for each Lead Capture Form by selecting “View Leads” from the edit dropdown menu.

Updating Your Google Drive Share Settings

Note: If you’ve connected your Resource Library to Google Drive but can’t see specific files or folders, it’s likely because those items or folders haven’t been made public within your Google Drive settings.

Resource Libraries will only display the files or folders available to select once they have been shared publicly. To make sure they’re available for you to add to your library, you’ll need to adjust the sharing settings of those files or folders in your Google Drive, as seen below.

Share your Resource in Google Drive

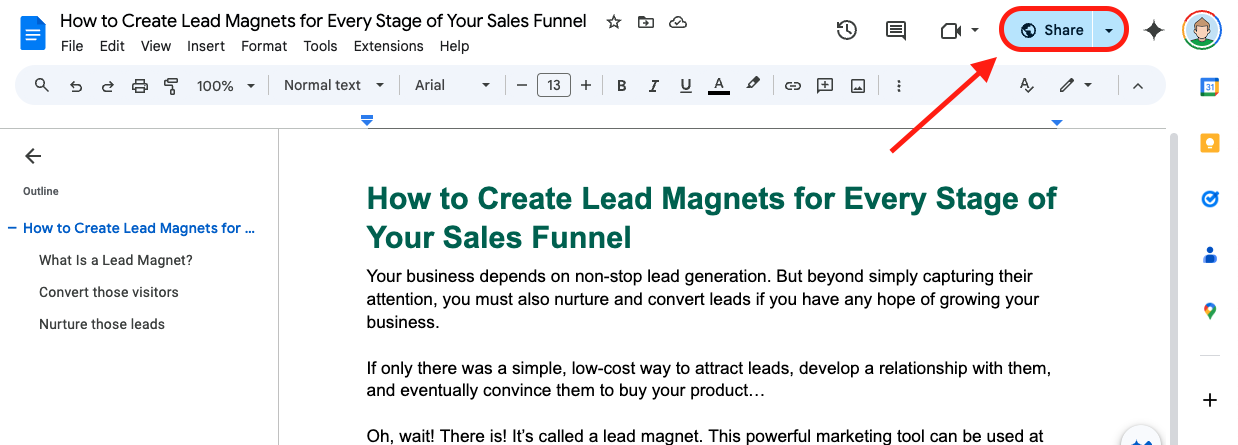
Once you’ve opened the resource you would like to share, click on the “Share” button in the doc.

Share Button

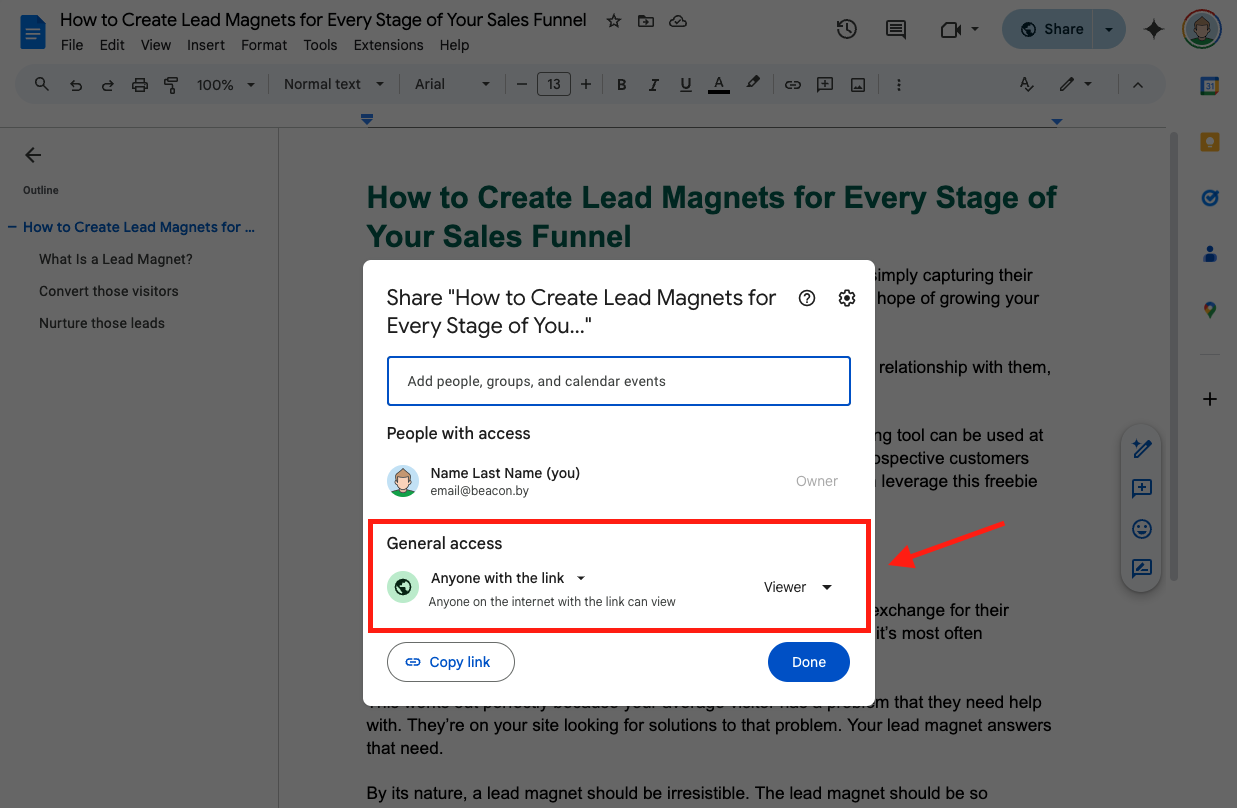
After you’ve clicked on the Share button, select ‘Anyone with the link’ from the General Access dropdown.

Be sure to leave their access as a “viewer”. You can also change the access to Editor, or Commenter if you need to collaborate on this file. If access to this file is time-sensitive, make sure to set an expiration date too.

General Access Anyone

For more information on sharing files from Google Drive, please follow this guide.

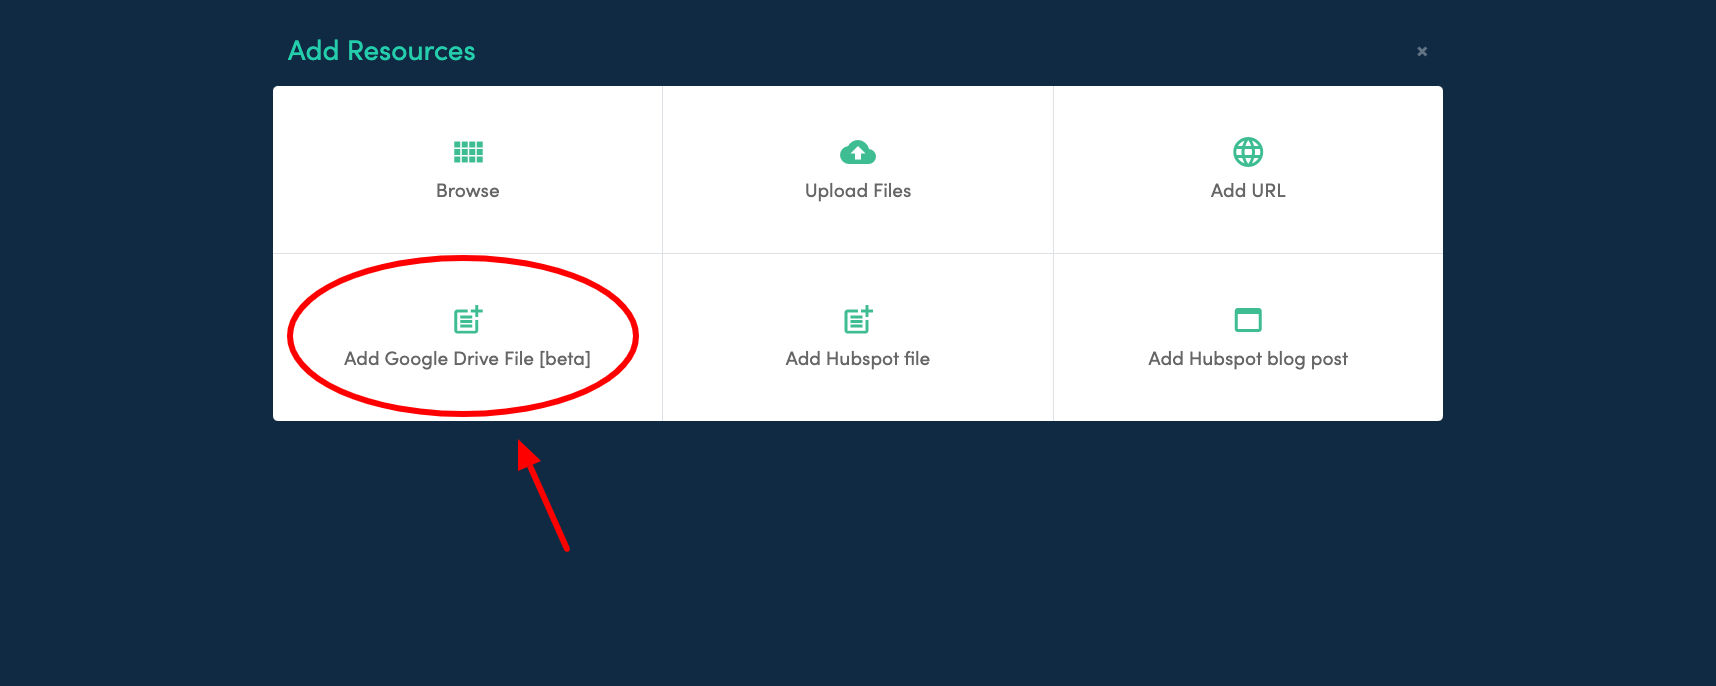
To add files from your Google Drive to Beacon Resource Library, click on this “Add Google Drive File [beta]” icon.

Add Google Drive File

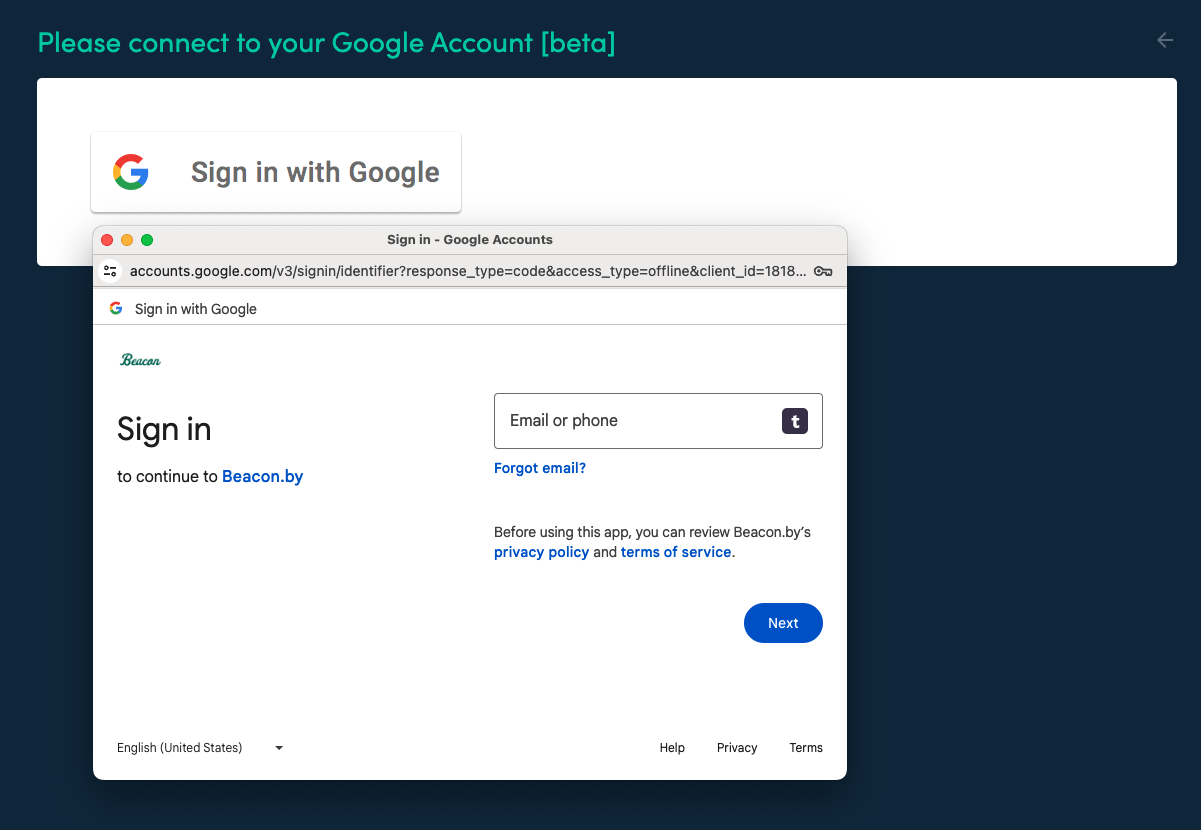
Sign into your Google Account

To connect your Google Drive and make your files or folders available to Beacon, click on the Add Google Drive File button and follow the prompts.

You’ll need to sign into your Google account.

Sign in

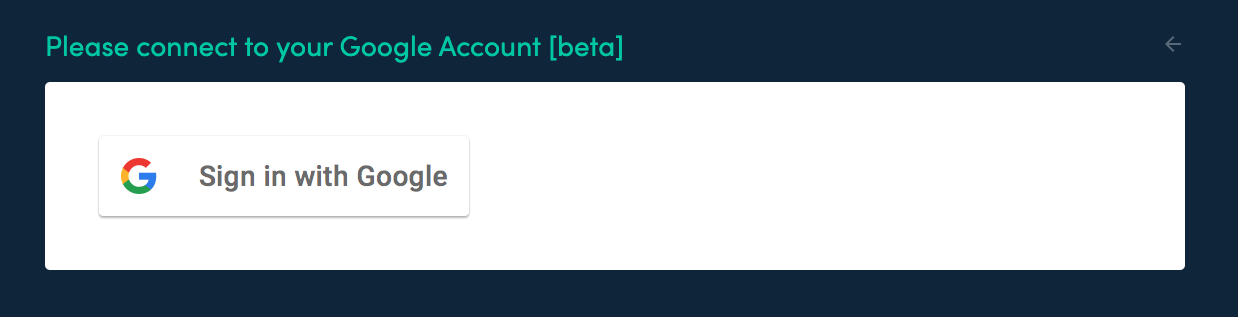
You will then be presented with a popup to select an existing or sign into your Google account.

Sign in with Google

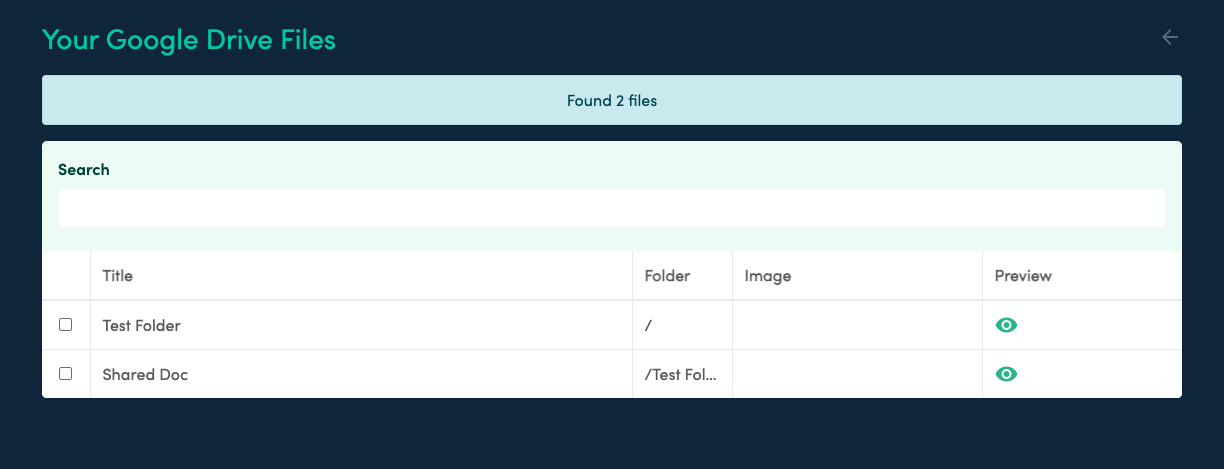
List of files and folders

Once you’re logged in, you will see a list of folders and files publicly available in Google Drive.

Google Drive Files

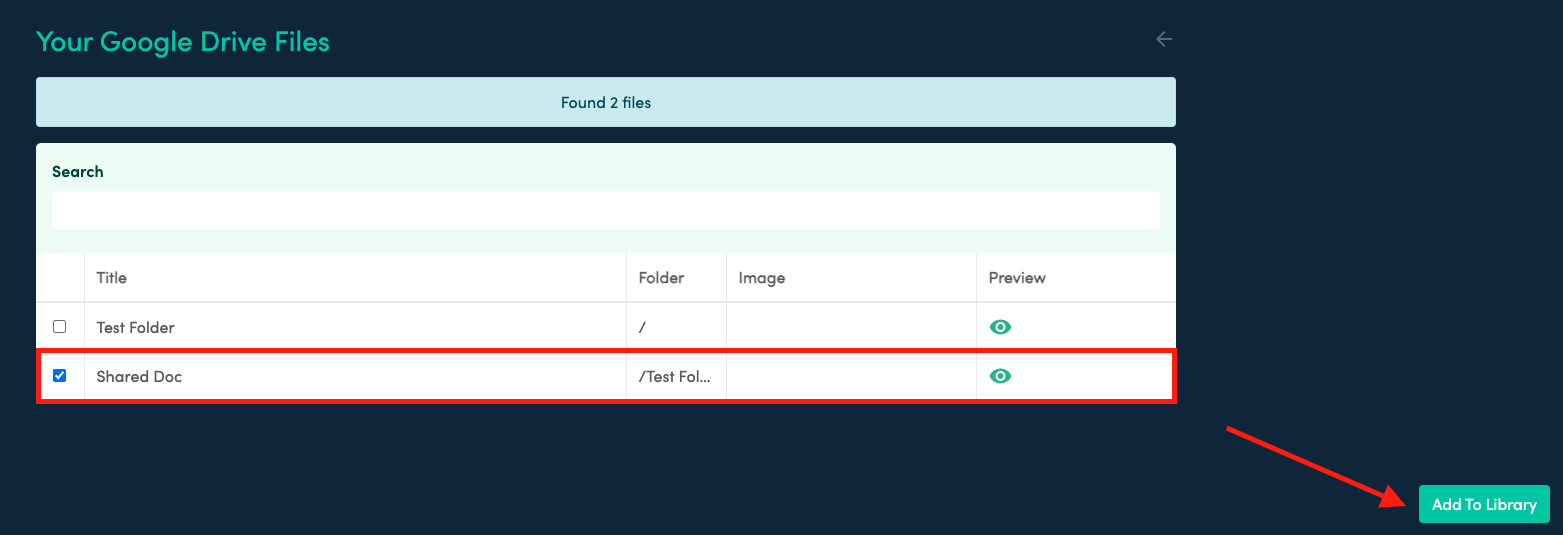
Select the files or folders you would like to share and click on the “Add To Library” button.

Add to Library

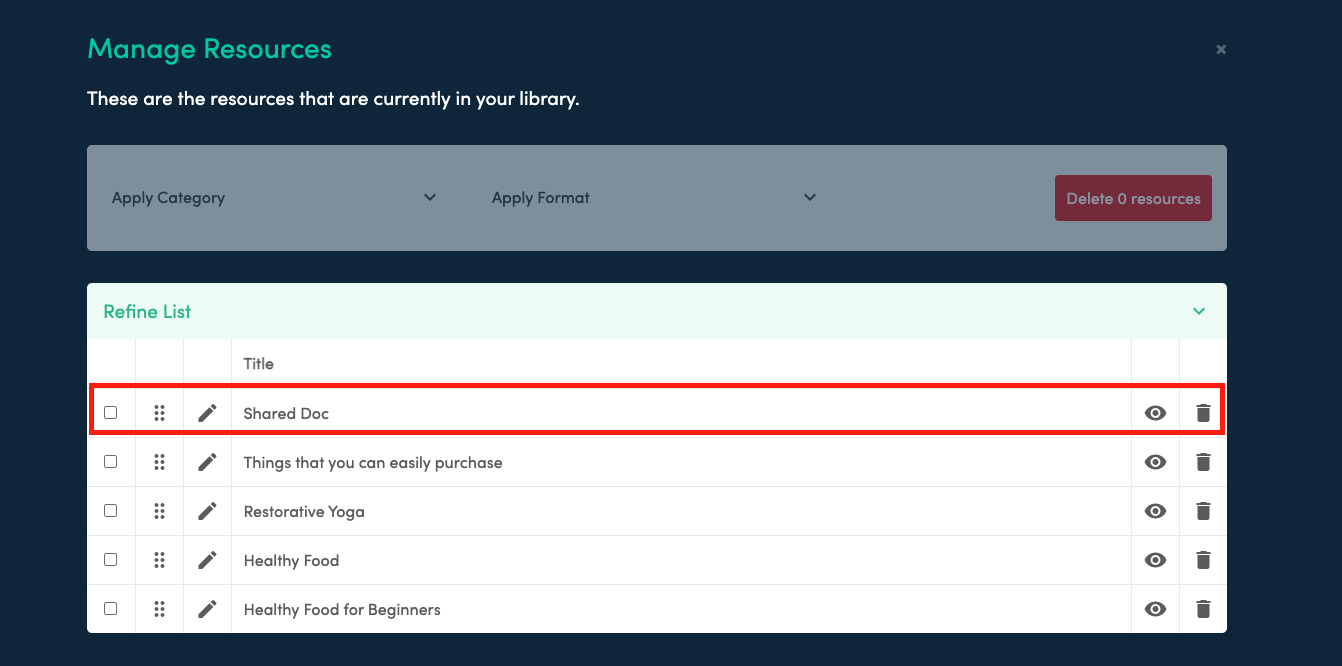
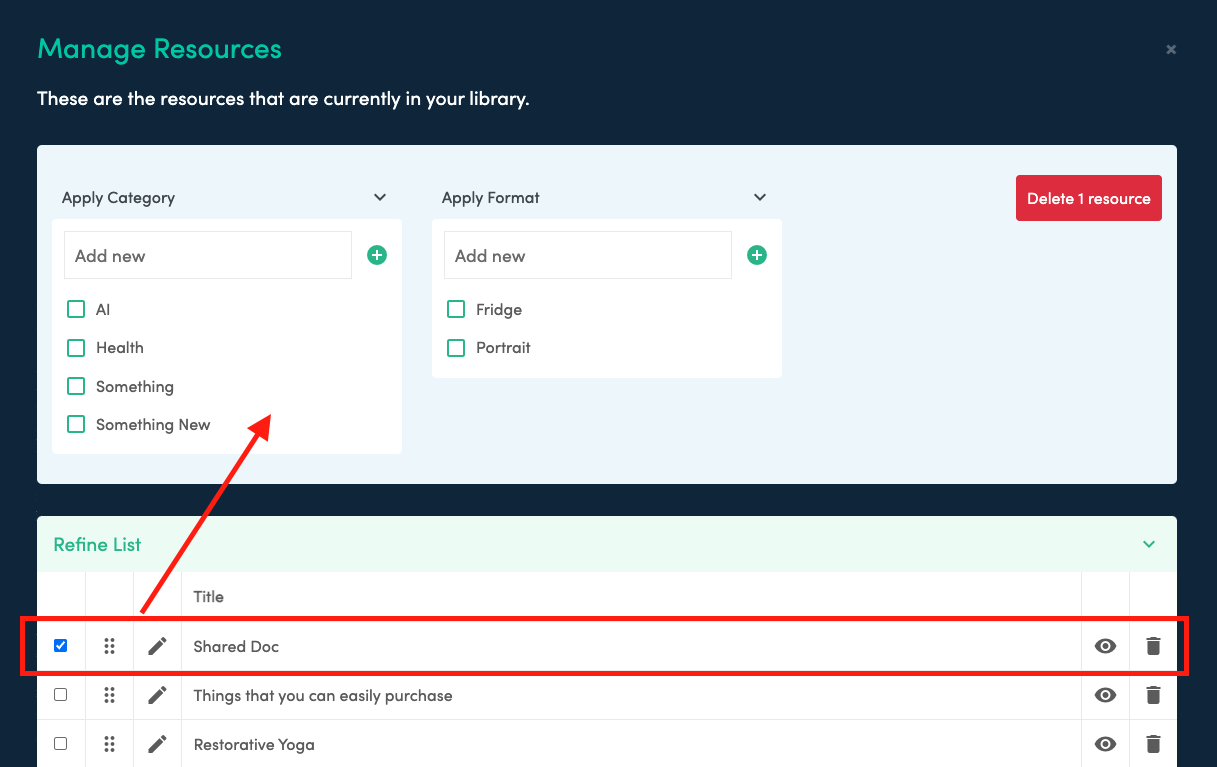
Once you’ve added the resources to your library, it will be available to manage in your list of resources, as seen below. Feel free to drag and drop those resources to change their order in your Resource library.

Manage Resources

Changing the order here, will also change the order in which they are displayed to visitors.

Each Resource

Categorizing Resources

To make your resource easier for visitors to find, you can categorize them by assigning a relevant category or format. This enables visitors to filter the resource list and quickly locate the specific items they are interested in.

Add Categories and Formats

Once you’re happy with the order and selected the correct categories and filters, the newly added resource will be available for visitors in your library as seen in the preview window.
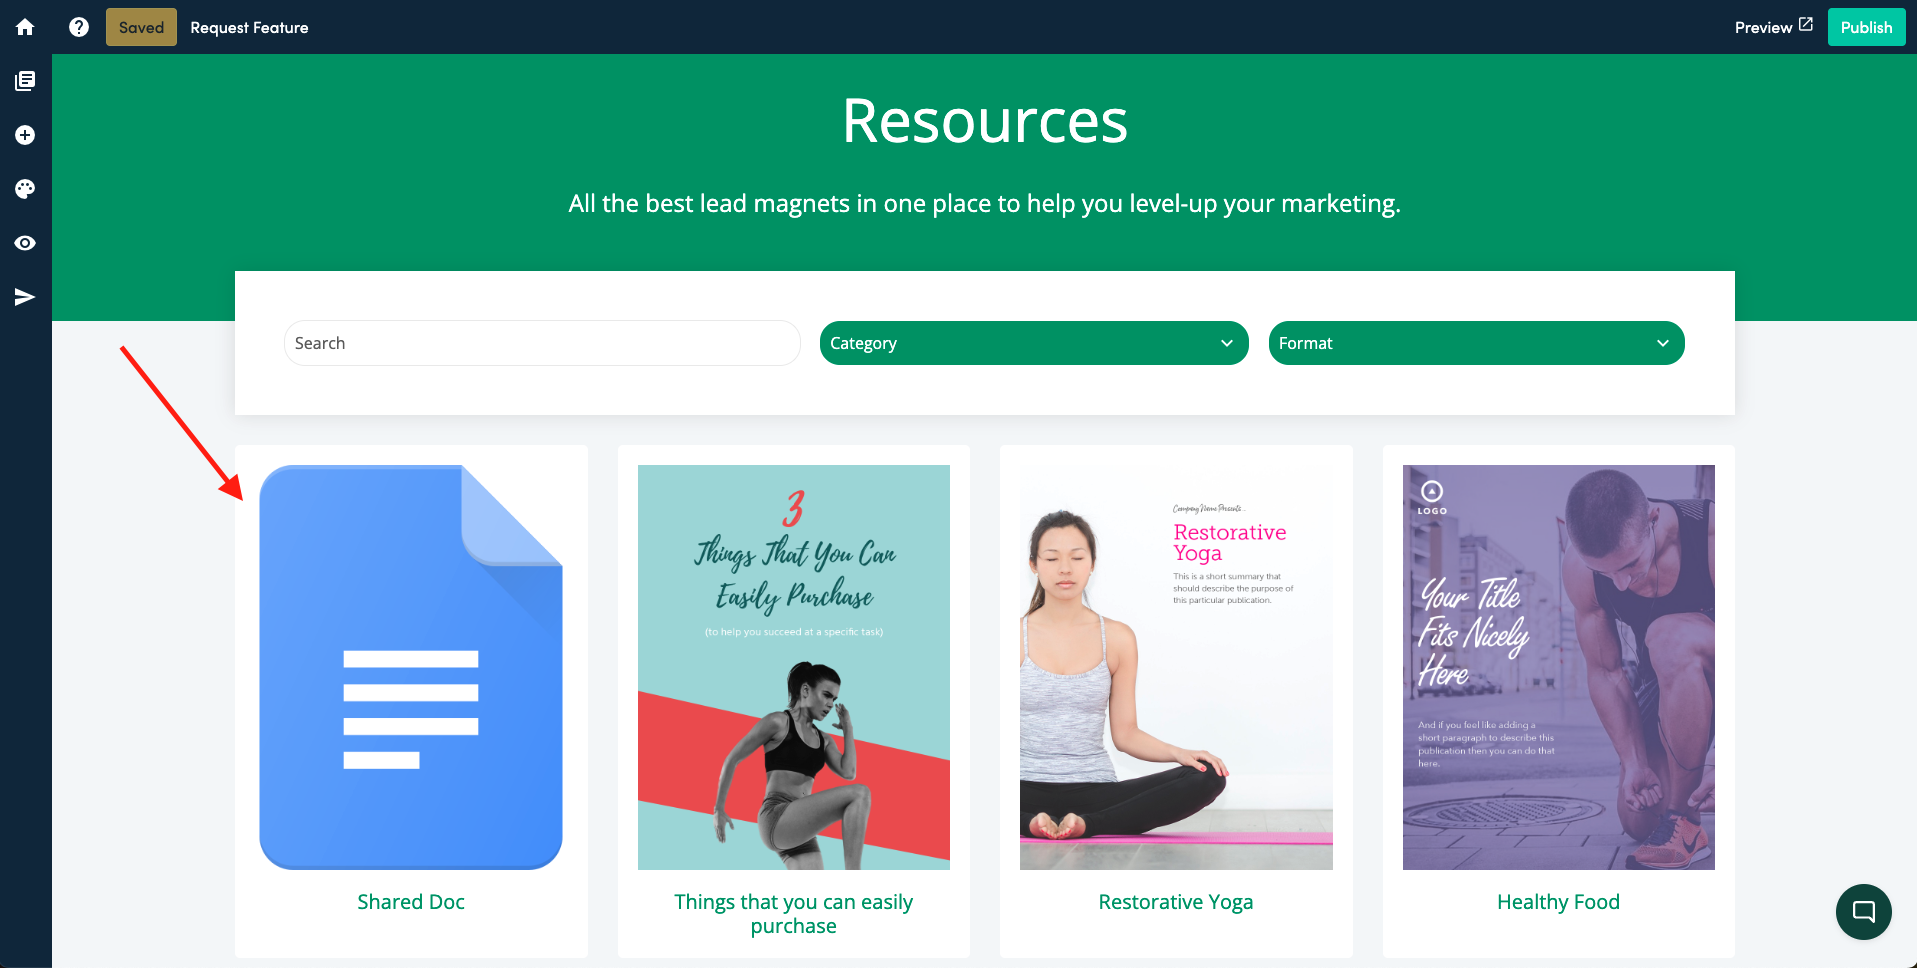
Change Thumbnail

To change the thumbnail of the shared doc, click on the thumbnail, then on the “View Opt-in Screen” button.

View Optin Screen

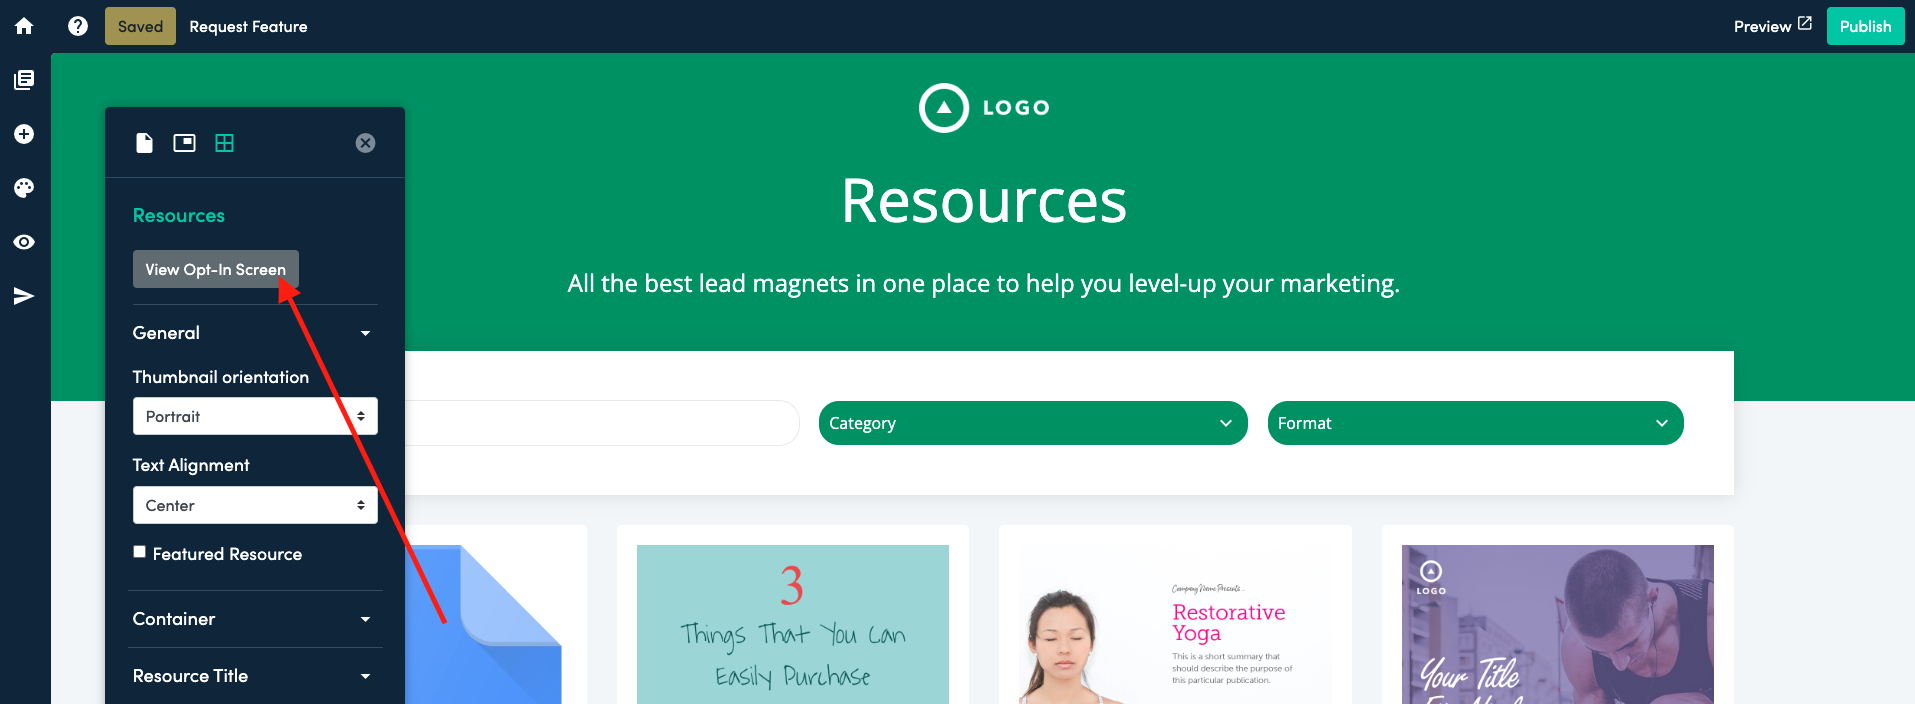
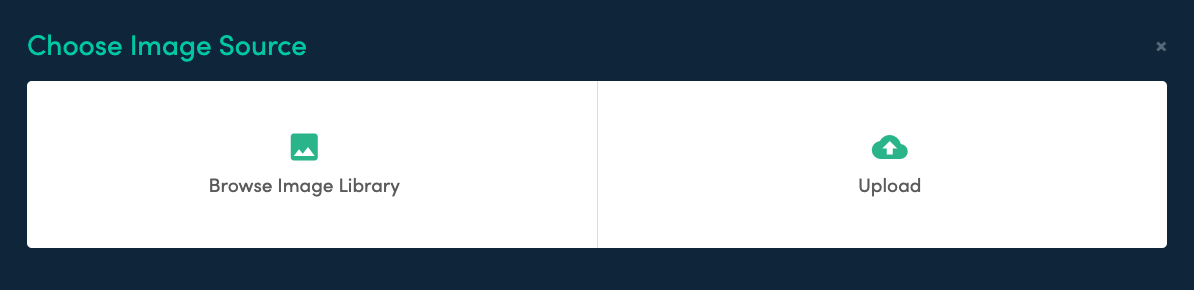
Next, you’ll click on the thumbnail and you will be prompted to upload a new file or browse your existing library to select a previously uploaded thumbnail.

Change Thumbnail

Choose the thumbnail you would like to use from your Image Library or Upload a new image.

Choose Image Source

That’s it, by categorizing your resources, you make it super easy for visitors to find exactly what they’re looking for. Make sure your best resources don’t go unnoticed.

It’s a win-win: You get the lead and they get the info they need.

Resource Library 60 Second Tour

Using Double Opt-In With Email Integrations

If you have double opt-in enabled, the subscriber’s email address will only be sent to your email marketing provider when they click the confirmation link.

The order of events is like this:

  1. Subscriber opts-in to your form

  2. Subscriber receives email asking them to confirm their email address

  3. Subscriber clicks confirmation link

  4. Subscriber’s email is passed to email integration

  5. Subscriber is redirected to lead magnet

You can view the confirmation status of any subscriber via either the Lead Capture or Resource Library dashboards:

See the ‘confirmed?’ column for details:

Google Drive Integration

Method 1 – When Creating A New Library

If you have not already created a Resource Library you can do that via the Resource Library dashboard:

After choosing your template select ‘GDrive’ as your source and then click the ‘Sign In With Google’ button:

You will now be prompted to sign in to your selected Google account:

After connecting to your Google account Beacon will now display all the public files in your GDrive folder.

Please note that we can only access files that are set as ‘public’

Use the checkbox on the left-hand side to select the files that you want to include in your resource library. Click the ‘continue’ button in the bottom right-hand corner to finish the process.

Method 2 – When Editing An Existing Library

If you want to add files from your Google Drive to an existing library first choose the ‘add resources’ option:

Next, select the ‘Add Google Drive File’ option:

And click the ‘Sign In With Google’ button:

You will now be prompted to sign in to your selected Google account:

After connecting to your Google account Beacon will now display all the public files in your GDrive folder.

Please note that we can only access files that are set as ‘public’

Use the checkbox on the left-hand side to select the files that you want to include in your resource library. Click the ‘Add To Library’ button in the bottom right-hand corner to finish the process.

Smart Subscribers

People may want to download lots of resources from your library so it would be a pain to enter their contact information for every resource.

If you enable Smart Subscribers then people will only have to enter their contact information for the first resource. After that, they can just click a button to get another resource.

To enable Smart Subscribers, visit the ‘Opt-In Settings’ screen:

Next, visit the ‘Opt-In Form’ section and click the ‘Smart Subscribers’ switch:

Now, a visitor will be shown this button when they click another resource:

(note that the consent checkbox remains in place to help with GDPR compliance)

You can change the button text to a different phrase via the Smart Subscribers settings:

Klaviyo Integration

When you generate a new lead you can choose to send the subscriber’s information directly to your Klaviyo account.

Step 1 – Generate Private API Key

To connect to Klaviyo you will first need to generate a Private API Key. You can do that in your Klaviyo account via this page.

Ensure that you give sufficient access as shown here:

Step 2 – Add A New Provider

Visit the email integrations tab of your Beacon account and click the ‘add a new provider’ button:

Choose ‘Klaviyo’ from the providers dropdown menu and paste your Private API Key here:

Next, click ‘add integration’.

Step 3a: Lead Capture – Select A List

If you are creating a Lead Capture Form then you can select what Klaviyo list the subscriber should be added to via the ‘Integrations’ tab:

Step 3b: Resource Library – Select A List

If you are creating a Resource Library then you can select what Klaviyo list the subscriber should be added to via the ‘Optin Settings’ screen:

Delivering Lead Magnets From Your Own Email Address

When someone opts-in to receive a resource from your library it will be emailed to them. If you want that email to show your address instead of the Beacon address then you need to add an email signature to your Beacon account.

Please note this feature is not available on free accounts. You can upgrade your account today and start delivering lead magnets from your own email address instantly.

Step 1: Visit Your Account Settings

Visit your account settings and click the ‘Sender Signatures’ button:

Step 2: Enter Your Details

Enter the name and email address that will be shown to people who receive your resources, then click the ‘add’ button:

Please note that you must be able to access the inbox of any email address that you enter here. Also, you can’t use free email addresses like gmail, hotmail etc.

Step 3: Confirm Sender Signature

Check your email account for an email from ‘Postmark Support’ and click the ‘Confirm Sender Signature’ button:

You should then be redirected to this page:

Now when you visit your Beacon settings page you will see that the email address has been confirmed:

Now all you need to do is assign the Sender Signature to your Resource Library or Lead Capture Form.

AI Content Card

Let’s explore how to use the AI Content Card to generate text for your lead magnet. You can find this helpful tool in the Drag and Drop menu.

When you drag this card onto the page the blue menu will open on the side of the screen.

You can use the settings in this menu to generate text based content and to style how that content looks.

Content Prompts

To generate content you should enter a ‘prompt’ in this text box:

A prompt can be a question that you want the answer to. For example, if I entered the prompt “what is content marketing”. Then I would get an answer displayed on the page.

Content Tone

You can choose the writing style of the generated text by selecting an option from the tone dropdown menu. In this example I chose “Business Like” then clicked the ‘Generate’ button. This updated the text on the page to be more formal than the original version:

Alternative Prompts

You can also give instructions as prompts. For example, if I entered the prompt “list 5 benefits of content marketing” – I would get this response on the page:

You can also give more general instructions. For example, “write an introduction for a lead magnet titled A Beginner’s Guide To Content Marketing” – which would return this answer:

Note: If an existing AI Content Card paragraph is selected and you enter a new prompt, the new text will replace the current paragraph.

To add a new paragraph with a new prompt, you should drag a second AI Content Card onto the page.

Styling Text

You can style the generated text in the same way that you would style a regular Text Card:

Note: Changing the color, or styling the text will apply to the entire block, not just the selected text.

Textarea Card

The Textarea Card should be used to make your PDFs fillable. Drag this card onto the page from the side menu:

Textarea Menu

The blue Textarea Menu appears when you click on a Textarea Card within the page. These are the available options in the Textarea Card menu:

Text Color
Choose the color of the text within the Textarea Card.

Font
Choose the typeface that will be used for the Textarea Card.

Font Size
Increase or decrease the size of the text within the Textarea Card.

Label
This is the text that appears above the fillable box on the page.

Border Color

Change the color of the border around the fillable box.

Height

Change the height of the fillable box.