
How to Boost Growth with Drip Campaigns (3 Ready-Made Templates)
Drip campaigns are one of the most effective ways to nurture leads, onboard new clients, and even sell your services.
And I’m sure you know this already.
But if you still wonder how to actually create a drip campaign that can help you achieve those results, then I’ve got just the thing for you:
3 ready-made drip campaigns templates you could use to write your email sequence right away.
These templates will help you achieve four distinct business objectives:
- Stay on top of your prospect’s mind
- Nurture leads until they’re sales-ready
- Or onboard new clients.
So, let’s get cracking.
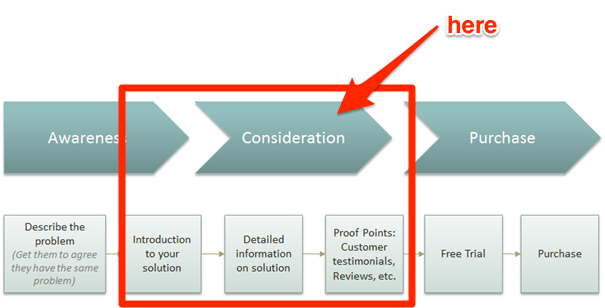
Template #1: The Top of the Mind Campaign
The purpose of the top of the mind drip campaign is simple:
To, as the name suggests, keep your product or service at the top of the prospect’s mind and stop them from engaging in any other similar solutions.
With this campaign, you aim to keep prospects thinking about your offering and position it as the most viable solution to their problem.
When to Use:
Ideally, you should use this email sequence to target warm leads who already consider your solution.
And that’s because, in your emails, you will be talking to prospects about the benefits of your product or service. And that’s not the information anyone in the early stages of the buying cycle might be looking for.
So, what emails to send in this sequence?
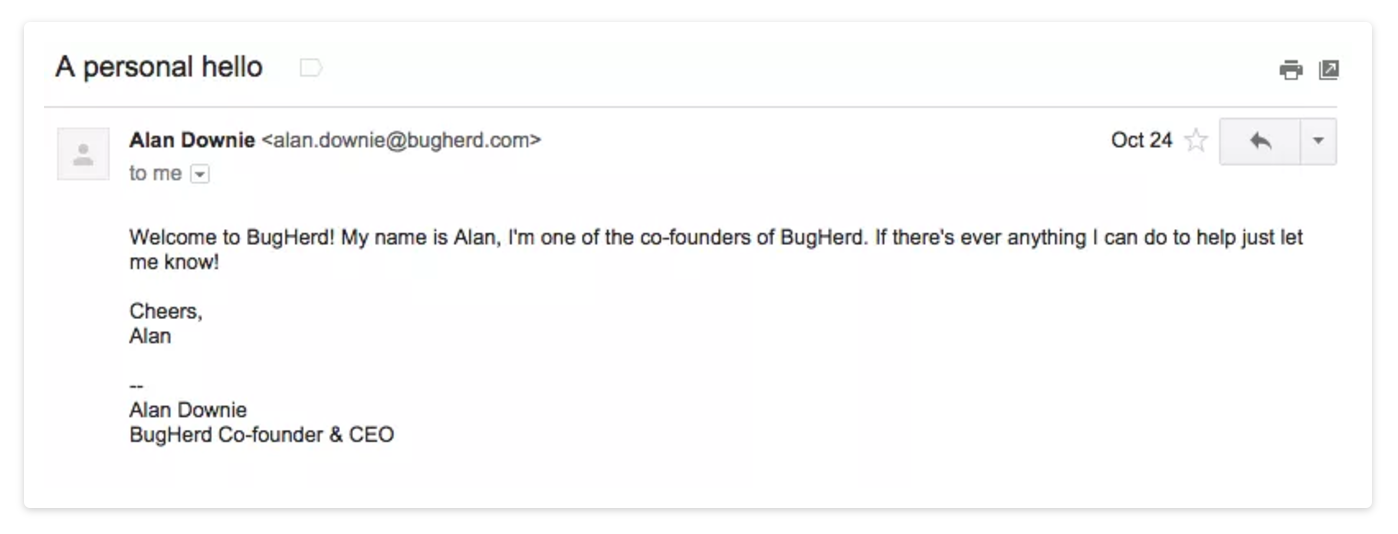
Email #1 – The Welcome Message
I’ve talked about writing welcome emails already here at Beacon (if you missed the guide, you could read it here).
So just to reiterate:
A welcome email gives you the opportunity to make a good first impression about you and your business, help you to get to know each other better, set the expectations, and deliver value right away.
A welcome email is also the most crucial message in the sequence (you’ll notice that every drip campaign template I cover in this post includes it).
In this email, you need to introduce the content you’re going to be sending in the drip sequence.
Also, you should provide any information that would help the person make the most of the emails you’re going to send them.
In the case of a Top of the Mind campaign, the welcome email could include any of the following:
- A personal welcome message,
- Information about the sequence
- Links to additional resources on your site a person might find useful
- Information on how they could reach out to you, should they have any questions.
Example:
Email #2 – Unique Product / Service Benefit
The goal of the Top of the Mind campaign is to keep someone from engaging with your competition.
And so, follow the welcome message with a person a short note that highlights something unique about your product or service.
Ideally, the message shouldn’t read like a sales pitch. Rather, you should make it relevant to a person’s problem.

Emails #3 & #4 – Recent Content Notifications
Follow the unique benefit with 2-3 emails that simply tell a person of any new content you’ve published recently.
Email #5 – Another Benefit
After a couple of content notifications, tell a person about yet another unique (or highly useful) benefit your product or service offers.
End this email with a call to action that could help move them to the next stage of the buying cycle – a demo, presentation, free consultation.
From then on, alternate the sequence between new content notifications and occasional benefit/feature overviews (with at least 3:1 ratio).
Template #2 – Lead Nurturing
As the name suggests, the goal of this campaign is to take a cold lead, someone in the early stages of the buying cycle, and warm them until they’re ready to buy.
Why lead nurturing is so important?
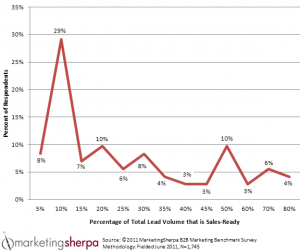
Well, for one, because as much as 73% of your leads aren’t sales-ready. These people might experience the problem your solution helps alleviate. However, they aren’t ready to consider paying to have it fixed.
As Jen Doyle from MarketingSherpa points:
“At the time of original lead conversion, an average of 27% of those leads will be qualified to the point where they are ready and willing to engage with Sales.
The remaining 73% are not there yet. When these leads are prematurely sent over to Sales, they are not receiving the experience they desire and will look elsewhere for it.”
That being said, many leads will eventually begin looking for solutions to purchase. And a lead nurturing drip campaign gives you the opportunity to stay with them until they reach that point.
When to use this sequence:
All lead generation campaigns that attract cold leads – i.e. lead magnets you publish on the blog, content upgrades, etc.
What emails to send:
(Before I begin, a quick disclaimer. I’ve first learned of this sequence from Rob Walling, the CEO of Drip, and I want to give the credit where it’s due.)
The focus of lead nurturing drip campaign isn’t to promote your product but educate a prospect about a potential solution to their problem.
For that reason, these email sequences often include an email course, for example:
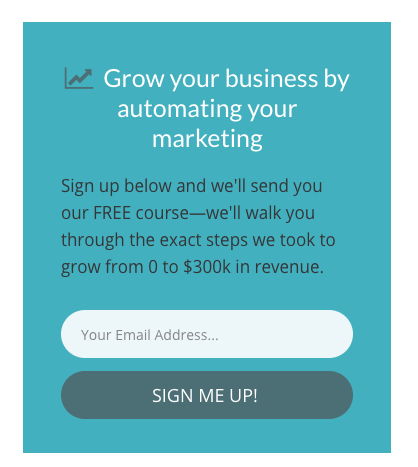
And here’s a typical structure of an email course you could use (as per Rob Walling).
Email #1 – Welcome Email
You already know what a welcome email and its importance in drip campaigns are. So let me just add what information you should include in the lead nurturing drip campaign:
- Introduce the topic of the course
- Offer information about how the course works, to help a person get the most value of your sequence.
For example:


Email #2 – First Practical Advice to Help a Person Alleviate the Problem
Remember, in this sequence; you’re educating a person how to achieve a particular objective.
And so, start big by offering them practical advice they could implement in their business or life immediately.
This could be a quick exercise or a series of steps they could take (depending on the topic of the course, of course) to achieve a specific result. The key thing is to make the first message actionable. This way you’ll keep the person engaged in your sequence.

Email #3 – Offer Background on the Problem
You’ve given a person some work to do.
And the chances are that they won’t be done before the next email arrives.
So, focus the next email on explaining the theory behind your solution.
This way, you’ll give the person more time to implement your practical advice but also, help them understand their problem better.

Email #4 – More Practical Advice
You’ve shared initial steps a person needs to take to solve their problem. You’ve also told them everything they need to know about it.
Next, send them more tasks to do. These could be more advanced actions that will help them eliminate the problem.
Email #5 – Proof and Call to Action
Up until now, your subscribers followed your advice on the premise of your authority.
But to truly convince them that you know this stuff inside out, you need to send them a proof – a short case study outlining how your solution has already helped someone else.
The email doesn’t have to be long. Even a couple of sentences that highlight the effectiveness of your solution will suffice.
Important – Include a call to action in the final email, that will help move a person deeper into your sales funnel. It could be offering them a presentation, a free consultation, or suggesting additional materials they could download (and moving them to a Top of the Mind campaign).
(Optional) Follow Up
You know, to me, this is the second most crucial email in the sequence, after the welcome message.
Not everyone who completes your course will act on the call to action. But that doesn’t mean that they will not be interested in talking to you later.
And a follow up gives you an opportunity to reach out and engage those prospects a couple of weeks after they’ve gone through your lead nurturing sequence.
It’s that simple.
Template #3 – New Client Onboarding
You know how to use drip campaigns to nurture leads and stay on top of the mind of your prospects.
But did you know that you could use email sequence to also interact with them once they become clients?
In fact, it’s the best way to increase the likelihood of a new client becoming a customer.
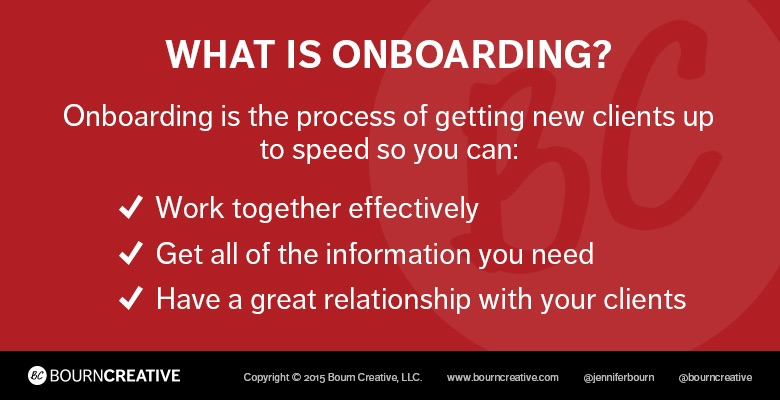
But before we go any further, let’s define client onboarding.
I’m going to use a definition I’m particularly fond of, from Jennifer Bourn. She describes client onboarding as:
“[…] the process in which:
- New clients acquire the necessary knowledge, understanding, and tools needed to be a good client
- A service provider or team acquires the necessary knowledge, understanding, and tools needed to be a good service provider.”
In other words, the goal of the process is to ensure that both you and the client are on the same page… something that I’m sure you know isn’t always a given.
So, how do you use drip campaign to aid in the process?
Client onboarding email campaign works particularly well in situations where delivery of your service requires initial setup process on your part.
For example, in my agency, we spend the first month of the engagement on research. And because of that, the client sees no results for a couple of weeks.
And needless to say, this “quiet time” on our part could easily contribute to some anxiety on the client’s part.
So we use a short drip sequence to keep clients informed about our actions.
And here are the emails we send:
Email #1 – Welcome Email
In this sequence, a welcome email has a slightly different purpose:
Instead of welcoming someone to your list, it aims to explain your process and tell a client what’s going to happen over the next couple of weeks.
You should schedule this email to go out as soon as you’re starting the work on a client’s project.
Email #2 – Update on the Progress
If not hearing from you for a while, a new client might go restless. After all, they’ve put their trust in you and paid you money. And now they want to see something in return.
But you’re working on getting their campaign ready, and understandably, have nothing to show for yet.
So, schedule an update email to go about a week after the welcome message, and tell a client what you’ve been working on so far.
This way, you’ll break the silence, and reduce any potential friction that might stem from them not knowing what’s happening.
Email #3 – Educational Materials
After another couple of days (depending on your typical time required for setup), send a client a couple of links that will help them learn more about your service, and the results they can expect.
Once again, you’ll break the silence and also, help the client understand the value you’re going to provide better.
And, that’s it. At this stage, you’ll probably have the first deliverable ready and can take over from the automated onboarding sequence.
And now you have it…
The three drip campaign templates that can help you achieve various business objectives – nurture leads, stay on top of prospects’ minds, and onboard them, once they become clients.
All that’s left is to start implementing those templates into your business.
Good luck.
Want to Generate More Leads? Check out how Beacon could help you generate eBooks and Checklists in minutes.